ArunTheKingy (talk | contribs) (→GMC) Tags: Visual edit apiedit |
(Adding categories) |
||
| (48 intermediate revisions by 13 users not shown) | |||
| Line 1: | Line 1: | ||
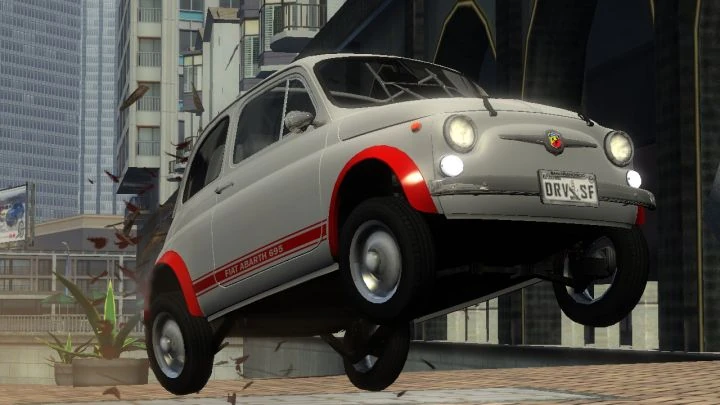
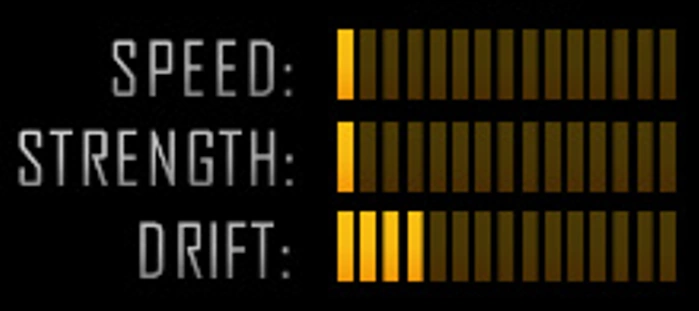
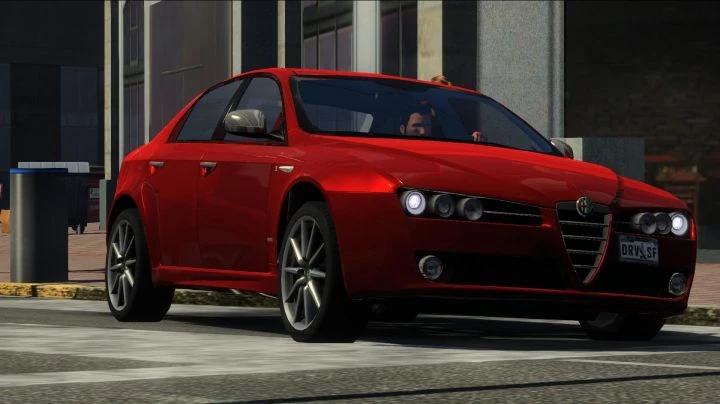
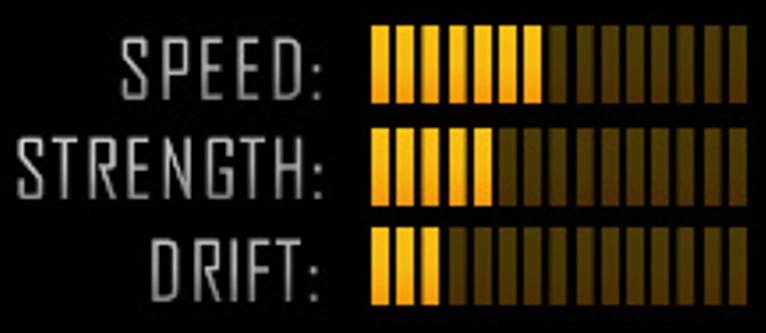
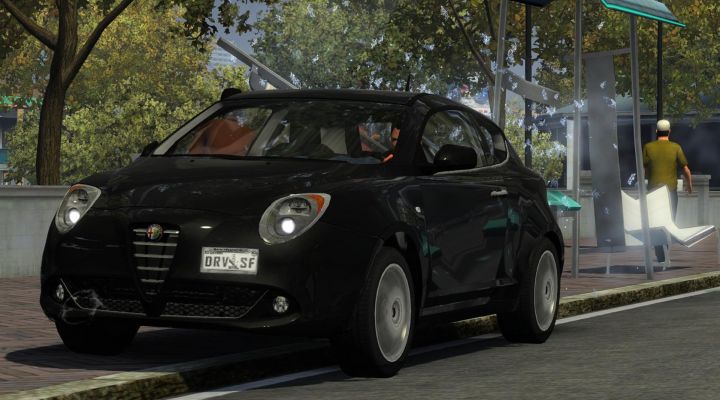
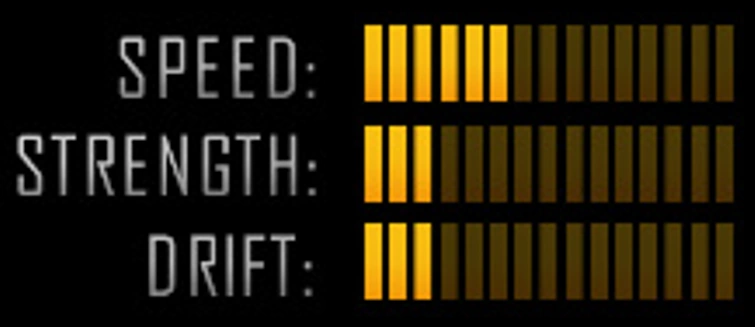
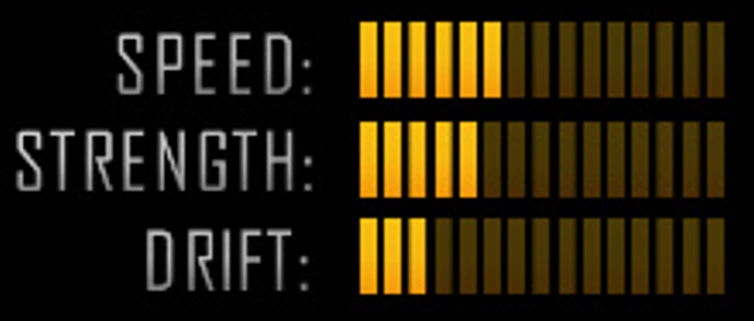
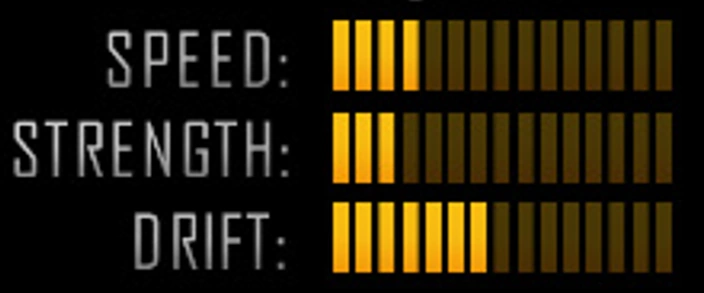
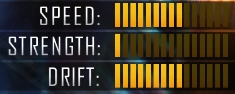
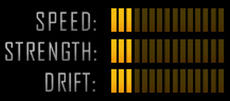
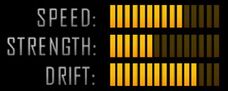
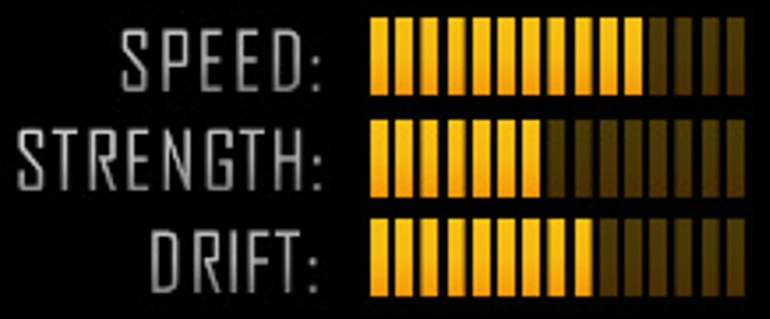
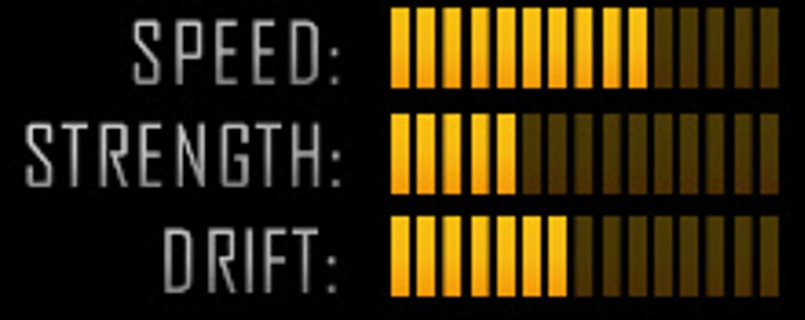
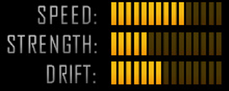
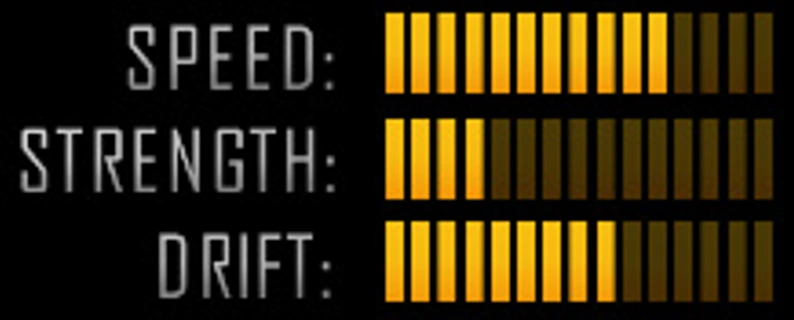
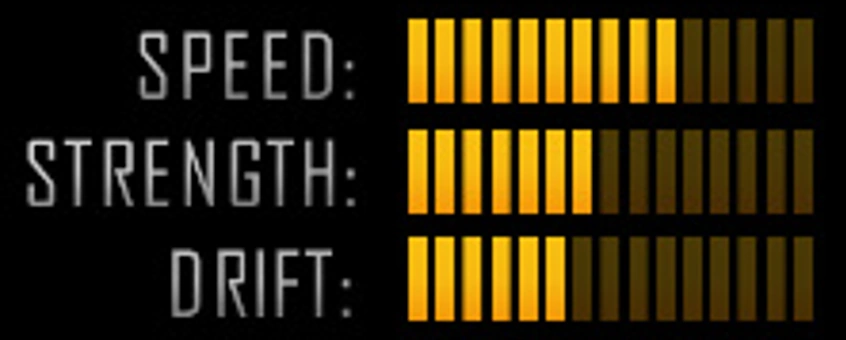
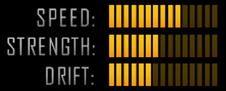
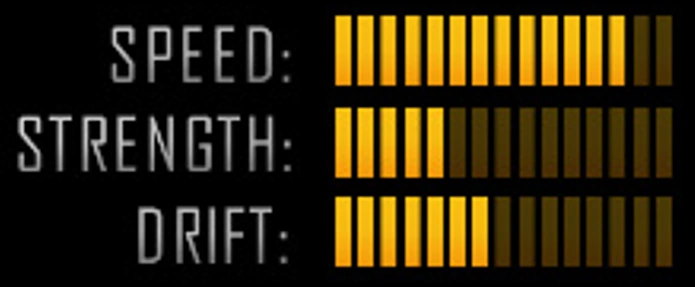
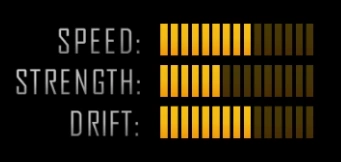
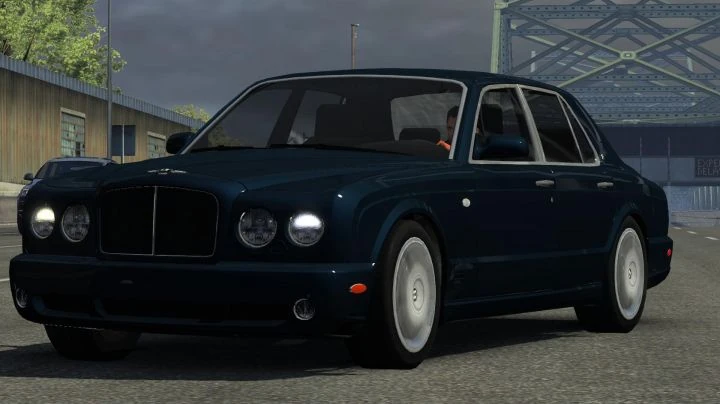
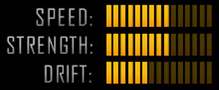
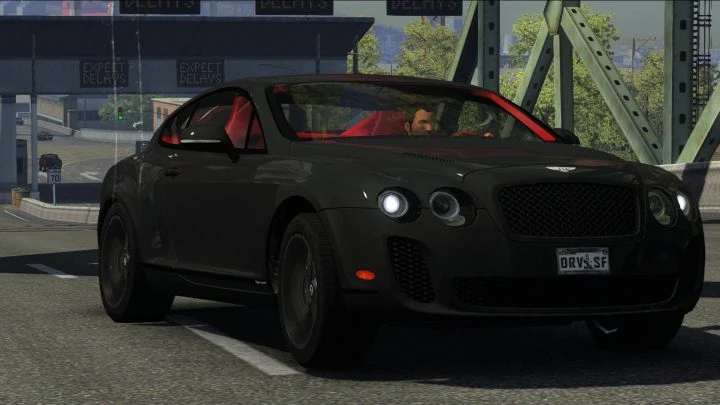
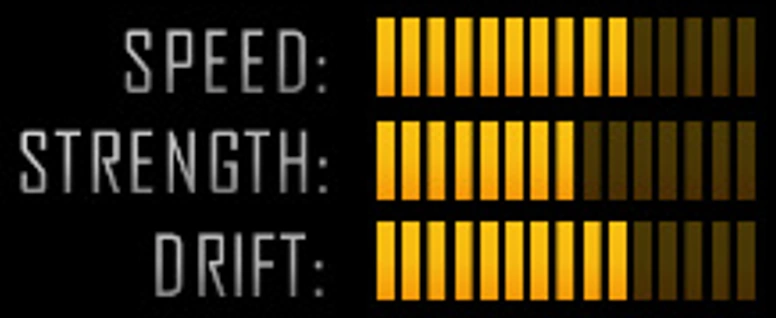
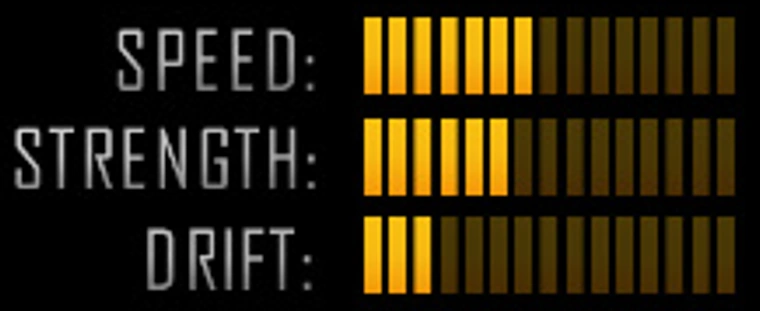
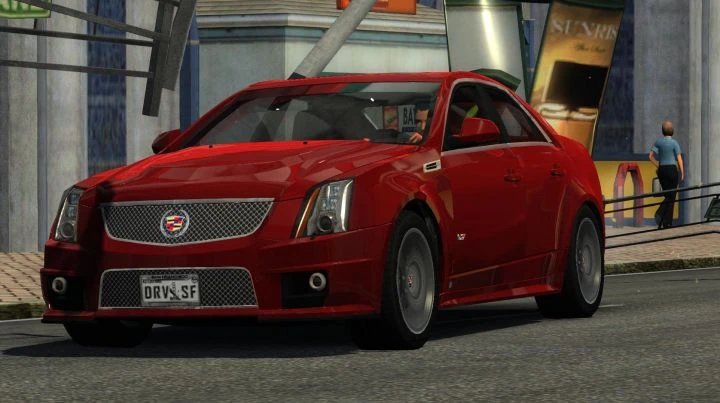
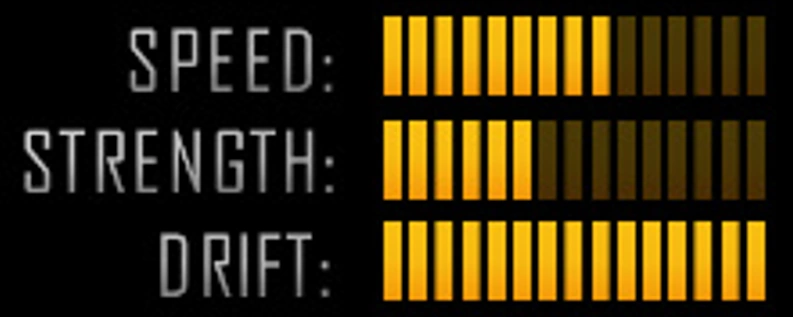
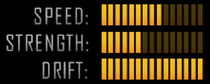
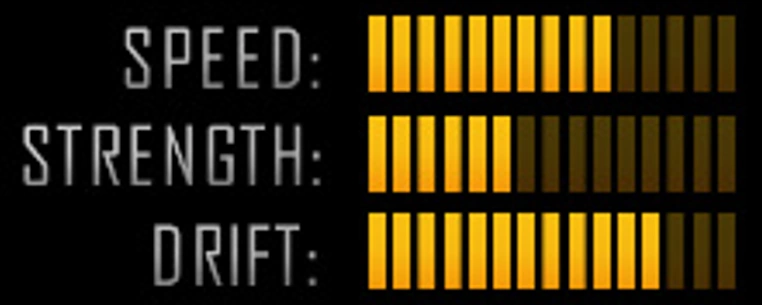
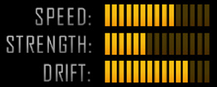
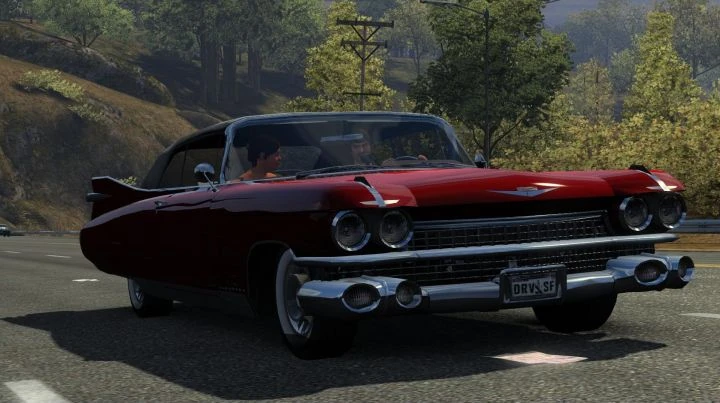
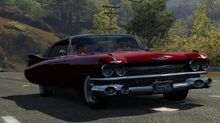
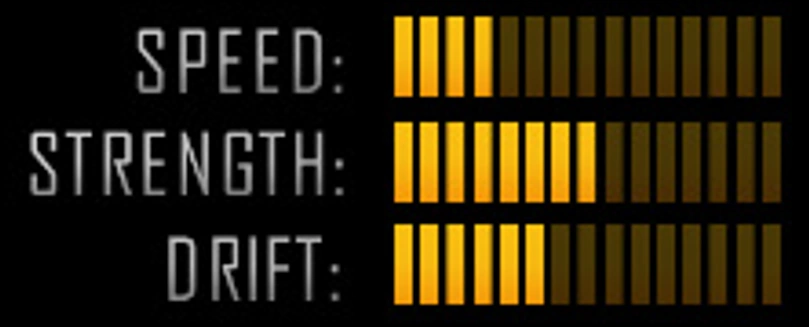
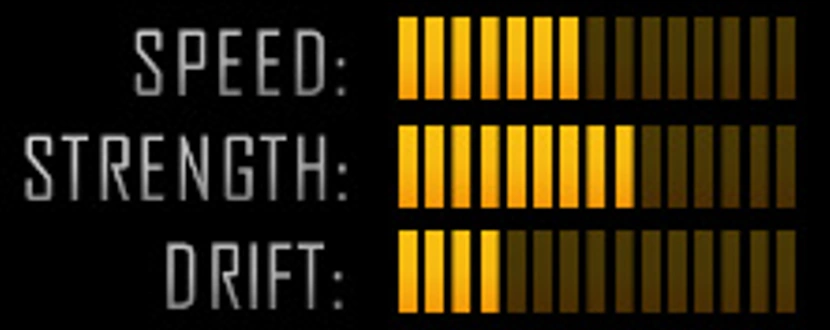
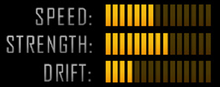
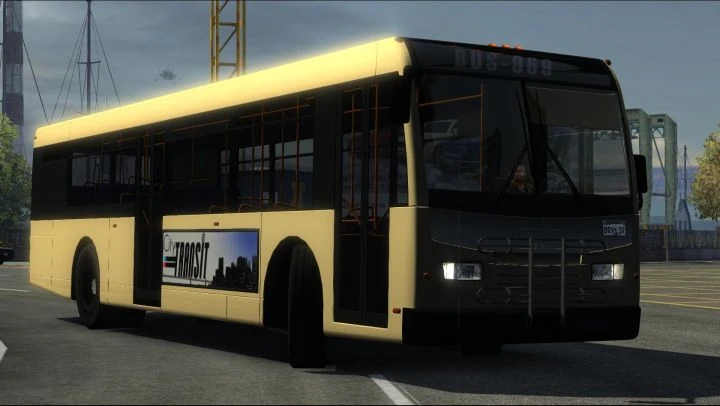
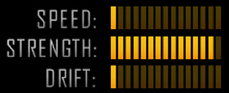
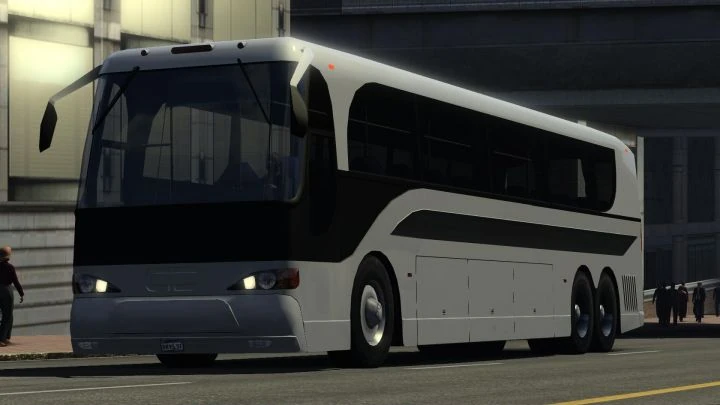
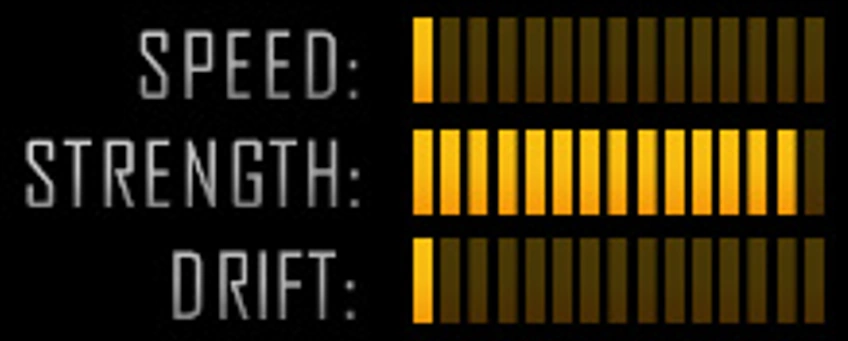
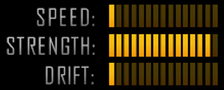
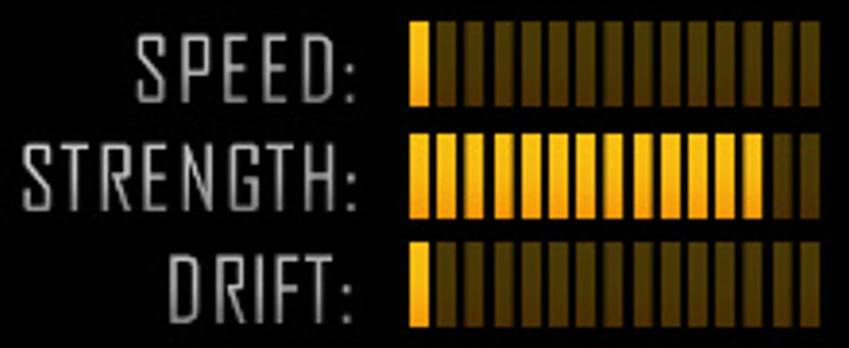
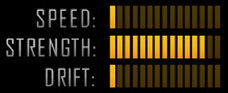
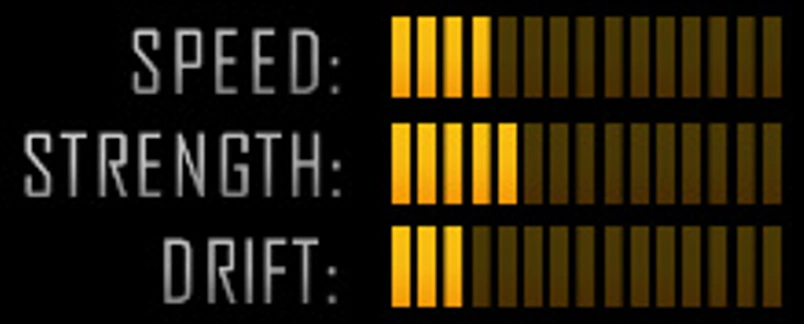
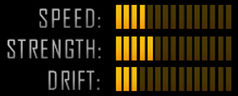
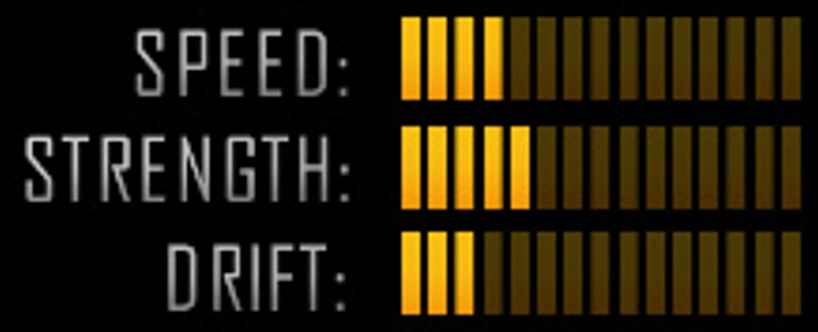
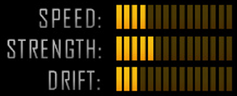
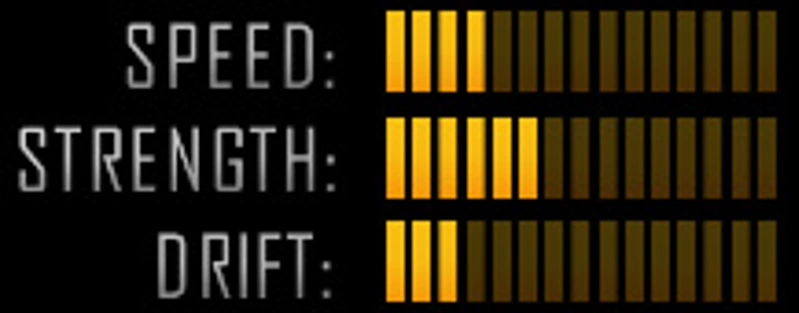
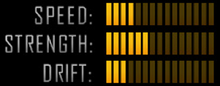
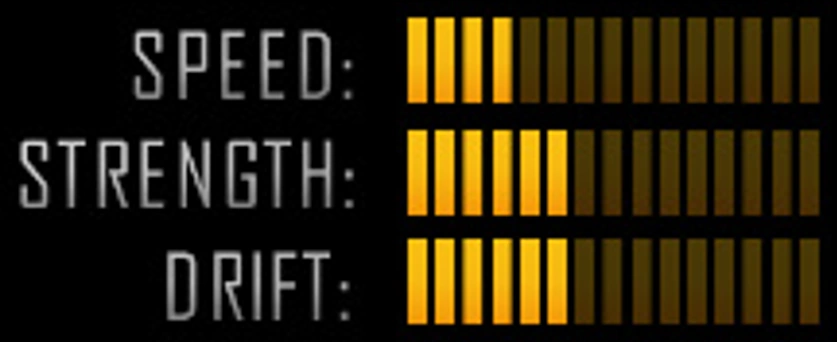
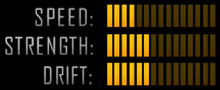
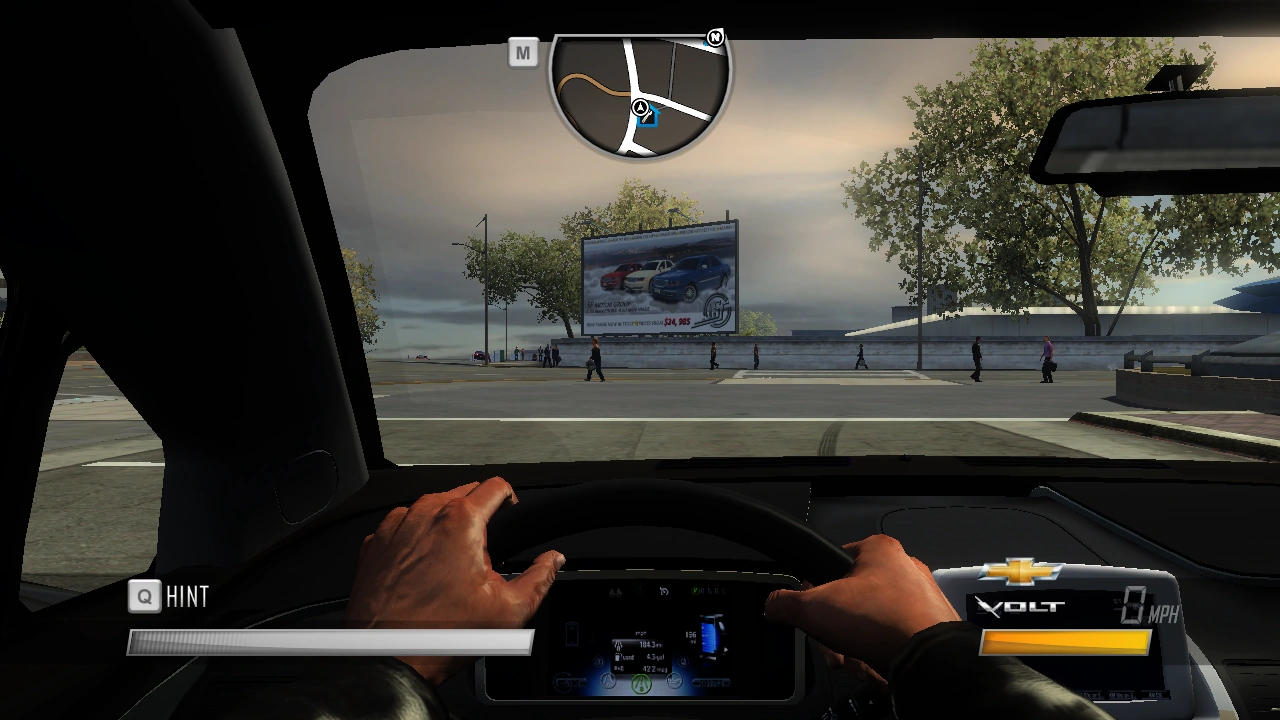
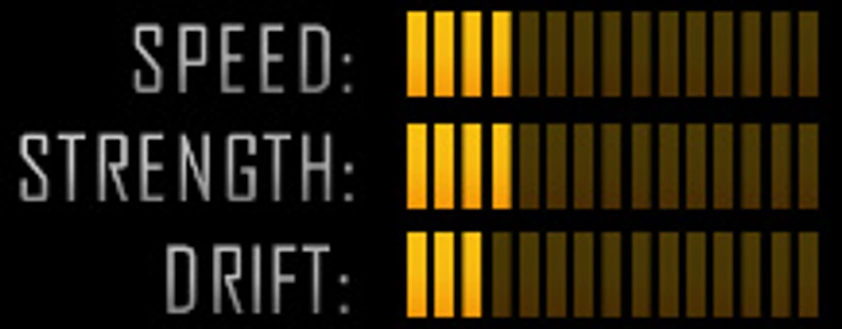
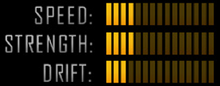
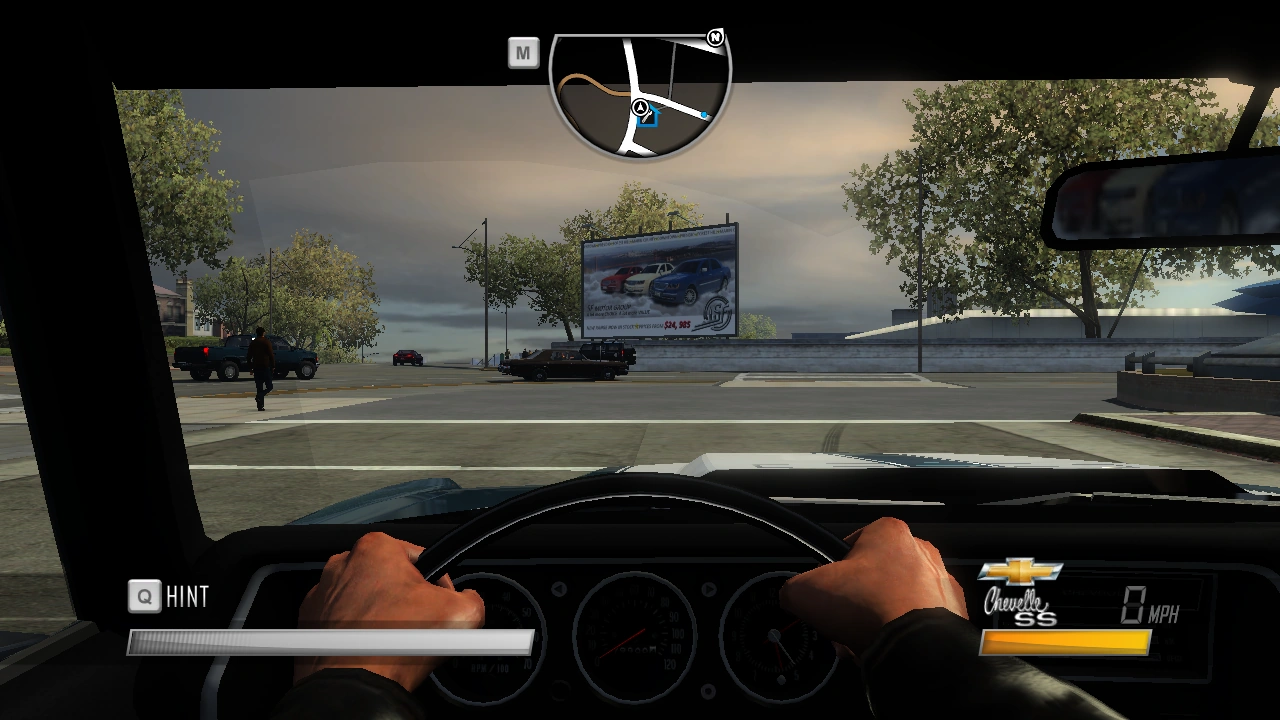
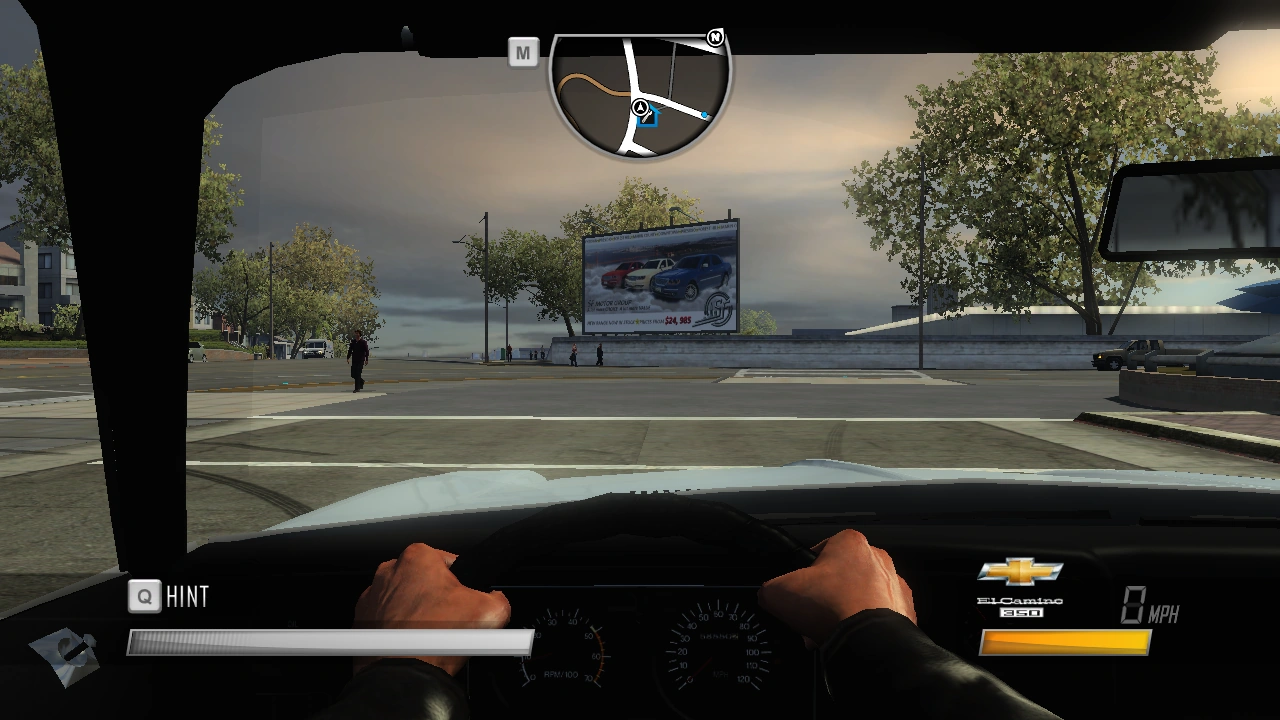
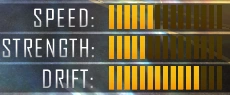
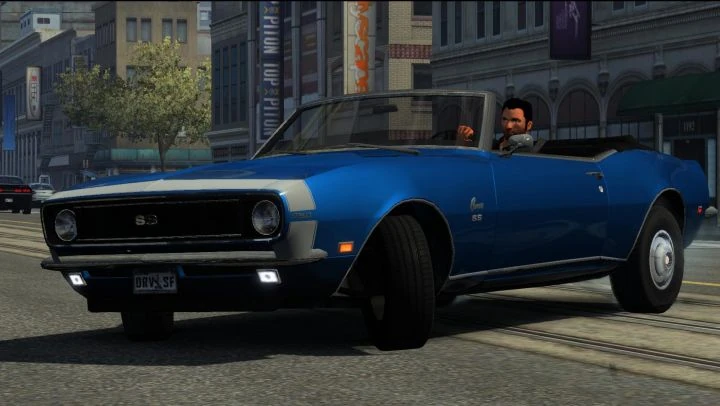
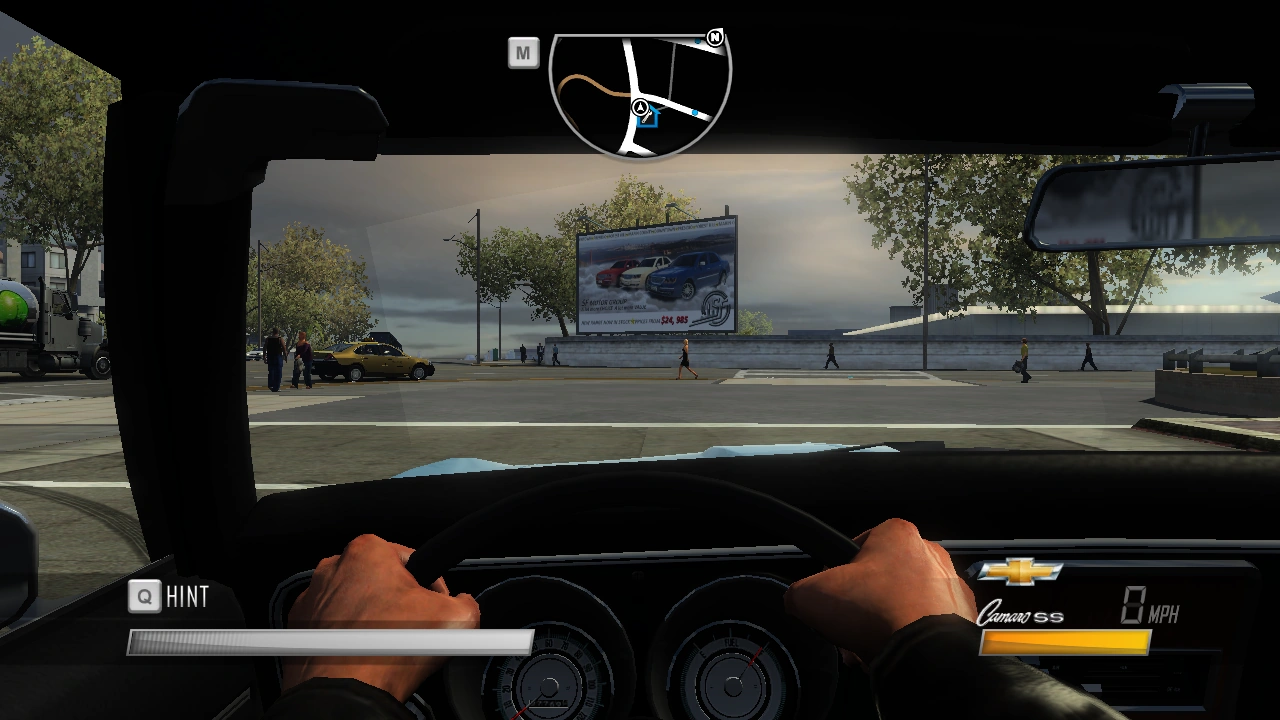
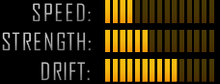
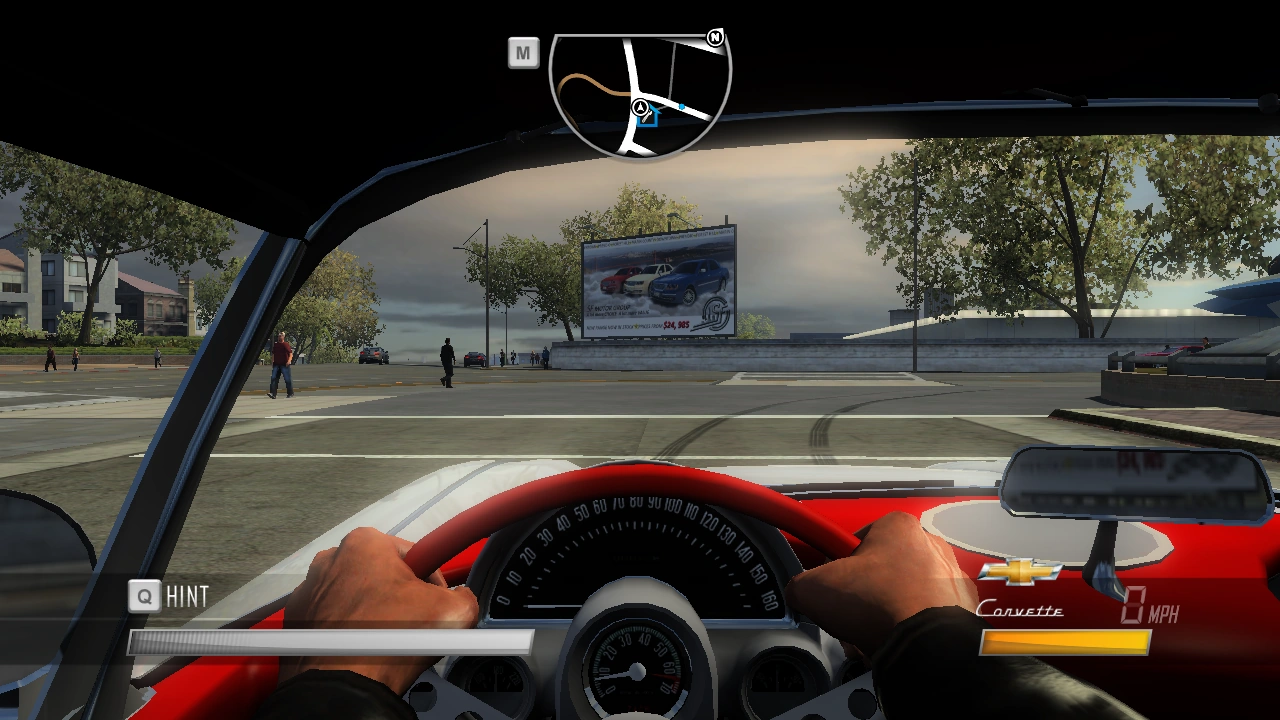
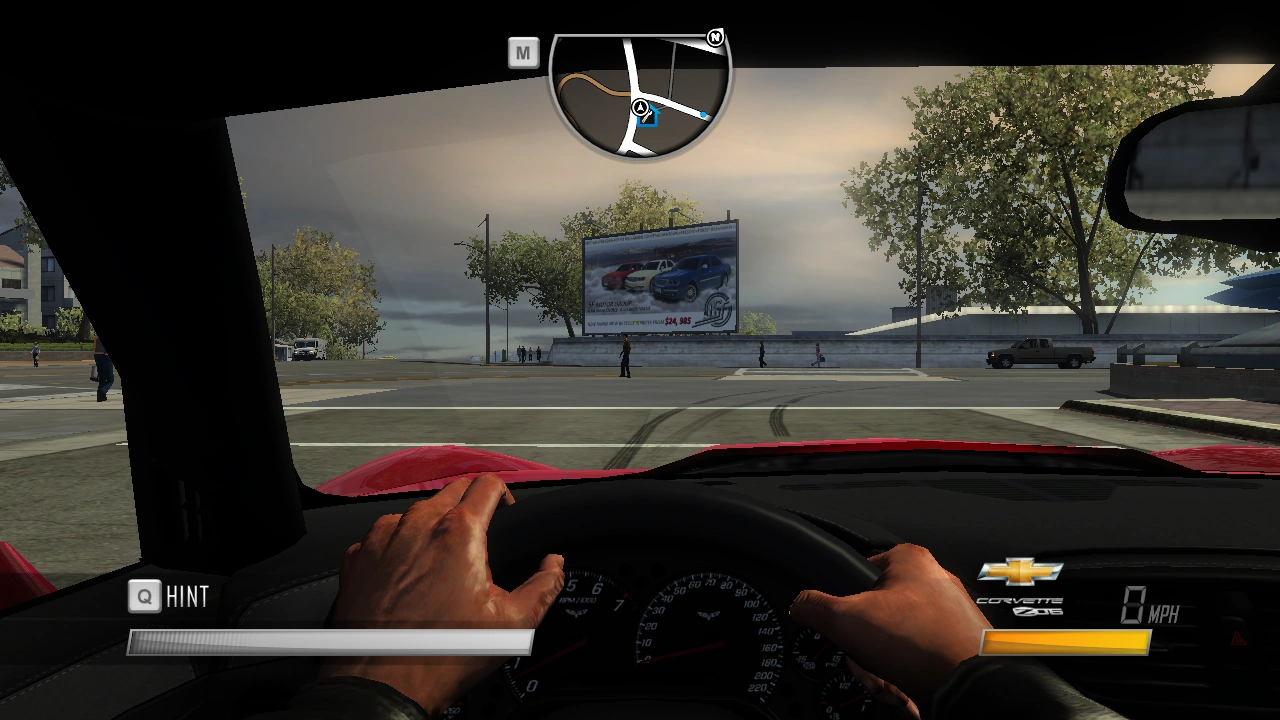
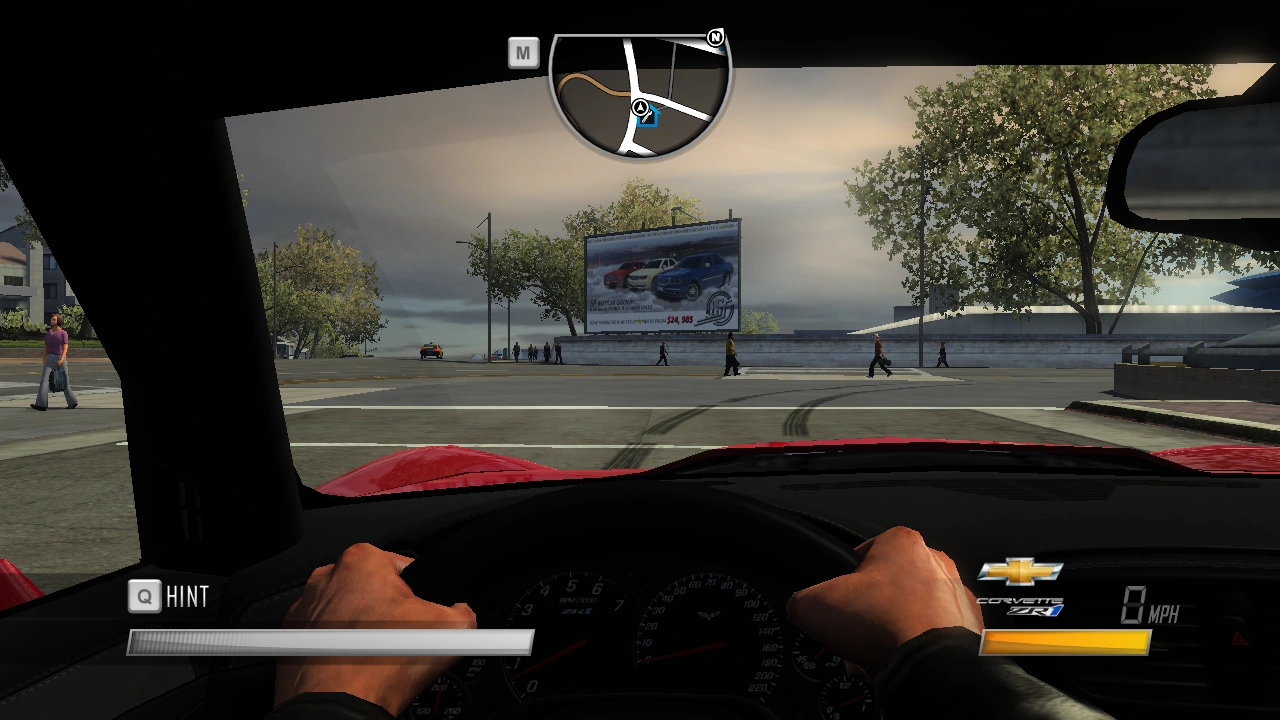
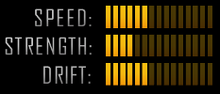
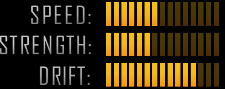
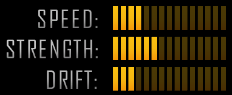
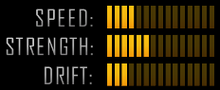
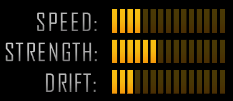
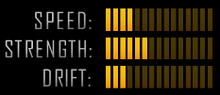
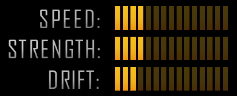
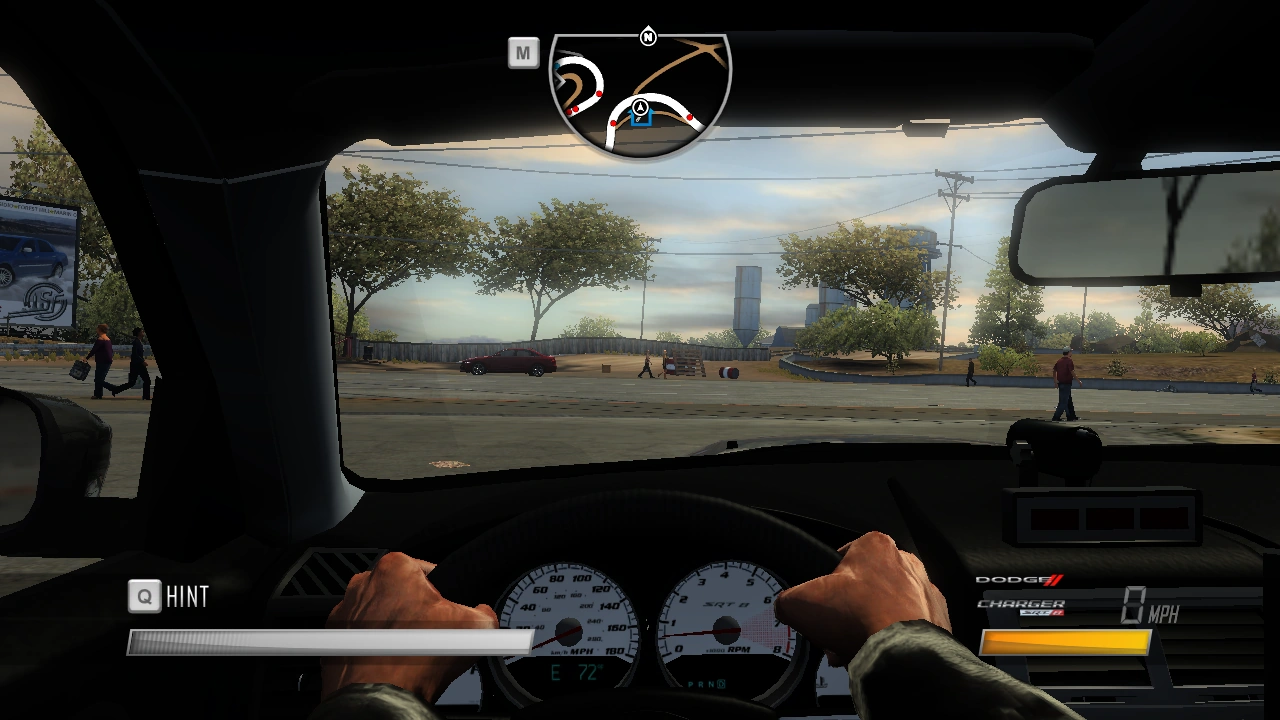
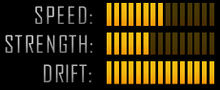
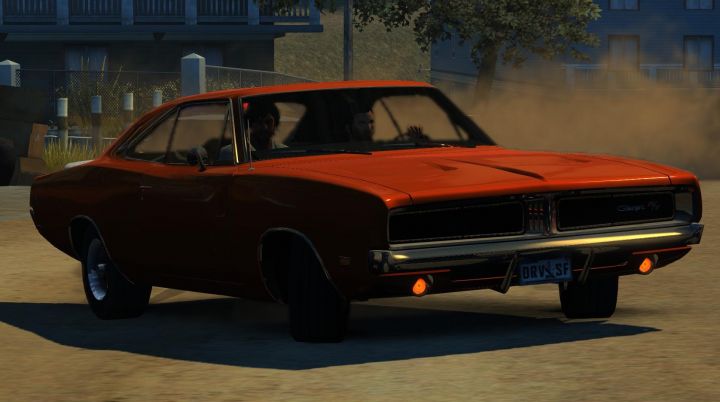
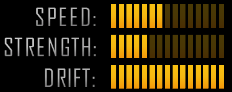
| − | Driver: San Francisco is the only game in the series that features licensed cars. Other popular brands of cars are placed in garages. There are a total of 10 garages around the city. Each bought garage unlocks access to challenges and vehicles that you can buy with earned willpower. You can earn more Willpower by completing dares, activities, and missions to buy cars. Each car has stats '''(SPEED, STRENGTH AND DRIFT) '''that if it totally fits to the dares, or your everyday tours. Want more? Go and check 140 licensed cars in Driver: San Francisco! |
+ | '''Driver: San Francisco''' is the only game in the series that features licensed cars. Other popular brands of cars are placed in garages. There are a total of 10 garages around the city. Each bought garage unlocks access to challenges and vehicles that you can buy with earned willpower. You can earn more Willpower by completing dares, activities, and missions to buy cars. Each car has stats '''(SPEED, STRENGTH AND DRIFT) '''that if it totally fits to the dares, or your everyday tours. Want more? Go and check 140 licensed cars in Driver: San Francisco! |
<sup>(''Note:'' The arrangement of the cars are based on the less-more willpower cost, not alphabetically.)</sup> |
<sup>(''Note:'' The arrangement of the cars are based on the less-more willpower cost, not alphabetically.)</sup> |
||
[[File:Picture3.png|thumb|74x74px]] |
[[File:Picture3.png|thumb|74x74px]] |
||
| − | == Abarth<nowiki/> == |
+ | == [[Abarth & C. S.p.A.|Abarth]]<nowiki/> == |
{| class="article-table" |
{| class="article-table" |
||
!Picture |
!Picture |
||
| Line 14: | Line 14: | ||
!Stats |
!Stats |
||
|- |
|- |
||
| − | |[[File: |
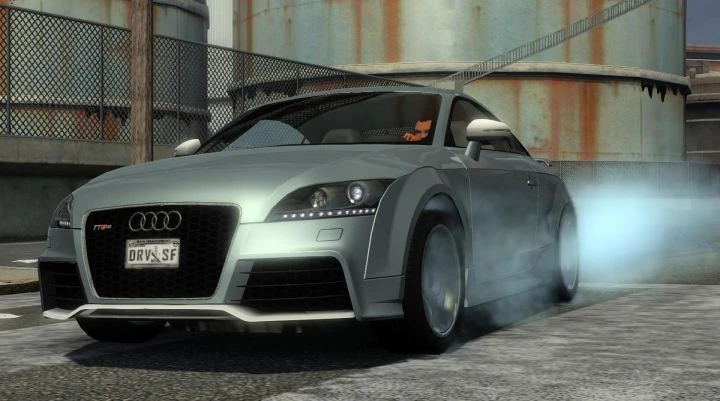
+ | |[[File:349.jpg|thumb|220x220px]] |
|Fiat 695 SS Assetto Corse |
|Fiat 695 SS Assetto Corse |
||
|5,000 |
|5,000 |
||
| Line 20: | Line 20: | ||
|[[File:Picture2-0.png|none|thumb|173x173px]] |
|[[File:Picture2-0.png|none|thumb|173x173px]] |
||
|- |
|- |
||
| − | |[[File: |
+ | |[[File:344.jpg|thumb|220x220px]] |
|500 |
|500 |
||
|7,500 |
|7,500 |
||
| + | |[[File:Driver 2016-12-26 17-15-05-58.jpg|thumb|220x220px]] |
||
| − | | |
||
|[[File:Picture4-0.png|none|thumb|174x174px]] |
|[[File:Picture4-0.png|none|thumb|174x174px]] |
||
|} |
|} |
||
| Line 30: | Line 30: | ||
== [[Alfa Romeo]] == |
== [[Alfa Romeo]] == |
||
{| class="article-table" |
{| class="article-table" |
||
| + | |+ |
||
!Picture |
!Picture |
||
!Name |
!Name |
||
| Line 39: | Line 40: | ||
! |
! |
||
|- |
|- |
||
| − | |[[File: |
+ | |[[File:330.jpg|thumb|220x220px]] |
|159 TI |
|159 TI |
||
|1,000 |
|1,000 |
||
| Line 47: | Line 48: | ||
| |
| |
||
|- |
|- |
||
| − | |[[File: |
+ | |[[File:325.jpg|thumb|220x220px]] |
|Mito |
|Mito |
||
|2,500 |
|2,500 |
||
| Line 55: | Line 56: | ||
| |
| |
||
|- |
|- |
||
| − | |[[File: |
+ | |[[File:Alfa Romeo Giulietta.jpg|thumb|220x220px]] |
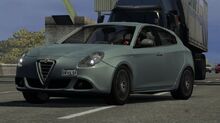
|Giulietta |
|Giulietta |
||
|3,000 |
|3,000 |
||
| + | |[[File:Driver 2016-12-26 17-19-44-48.jpg|thumb|220x220px]] |
||
| − | | |
||
|[[File:Picture10-0.png|none|thumb|204x204px]] |
|[[File:Picture10-0.png|none|thumb|204x204px]] |
||
| |
| |
||
| |
| |
||
|- |
|- |
||
| − | |[[File: |
+ | |[[File:342.jpg|thumb|220x220px]] |
|Spider |
|Spider |
||
Duetto |
Duetto |
||
| Line 72: | Line 73: | ||
| |
| |
||
|- |
|- |
||
| − | |[[File: |
+ | |[[File:324.jpg|thumb|220x220px]] |
|8C Competizione |
|8C Competizione |
||
|70,000 |
|70,000 |
||
| + | |[[File:Driver 2016-12-26 18-09-25-50.jpg|thumb|220x220px]] |
||
| − | | |
||
|[[File:Picture14.png|none|thumb|202x202px]] |
|[[File:Picture14.png|none|thumb|202x202px]] |
||
| |
| |
||
| |
| |
||
|- |
|- |
||
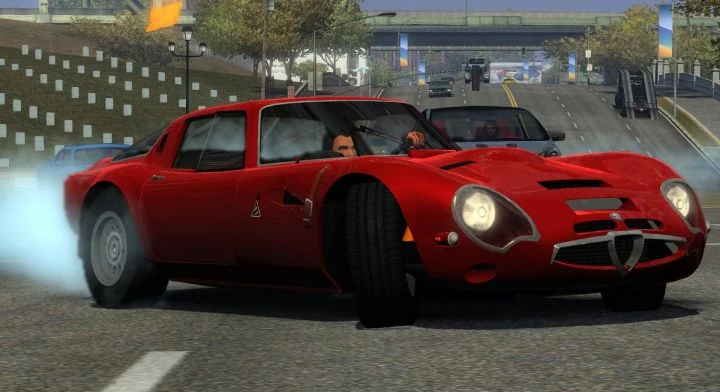
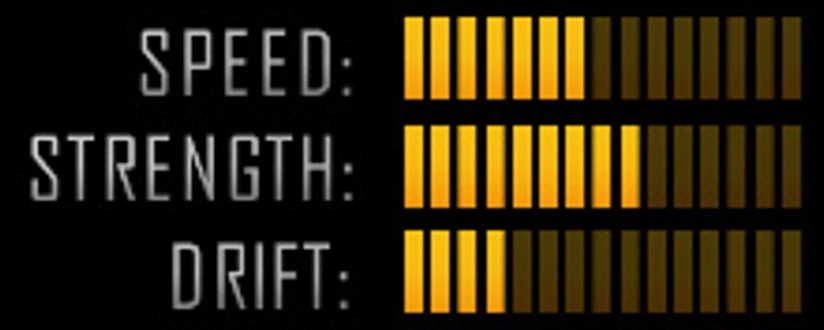
| + | |[[File:Alfa Romeo Giulia TZ2.jpg|thumb|220x220px]] |
||
| − | | |
||
|Giulia TZ2 |
|Giulia TZ2 |
||
|80,000 |
|80,000 |
||
| + | |[[File:Vehicles in Driver- San Francisco.png|thumb|216x216px]] |
||
| − | | |
||
| + | |[[File:Giulia TZ2 Stats.png|thumb|220x220px]] |
||
| − | | |
||
| |
| |
||
| |
| |
||
| Line 99: | Line 100: | ||
!Stats |
!Stats |
||
|- |
|- |
||
| − | |[[File: |
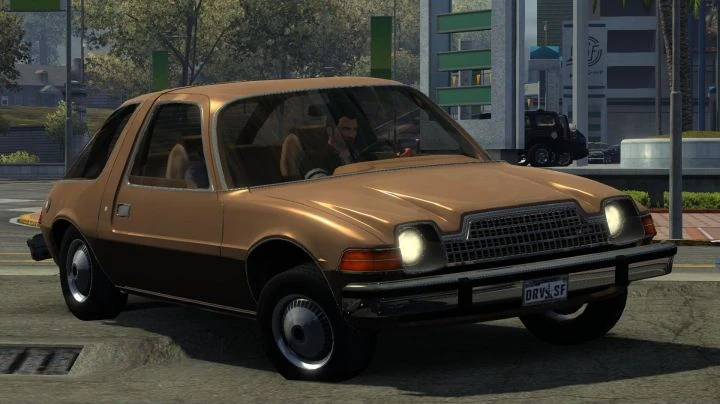
+ | |[[File:090.jpg|thumb|220x220px]] |
|Pacer |
|Pacer |
||
|1,000 |
|1,000 |
||
| Line 116: | Line 117: | ||
!Stats |
!Stats |
||
|- |
|- |
||
| − | |[[File: |
+ | |[[File:922.jpg|thumb|220x220px]] |
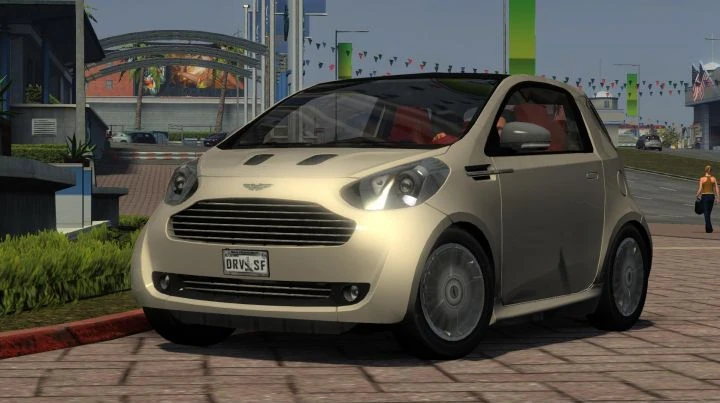
|Cygnet |
|Cygnet |
||
|15,000 |
|15,000 |
||
| Line 122: | Line 123: | ||
|[[File:Picture18.png|none|thumb|230x230px]] |
|[[File:Picture18.png|none|thumb|230x230px]] |
||
|- |
|- |
||
| − | |[[File: |
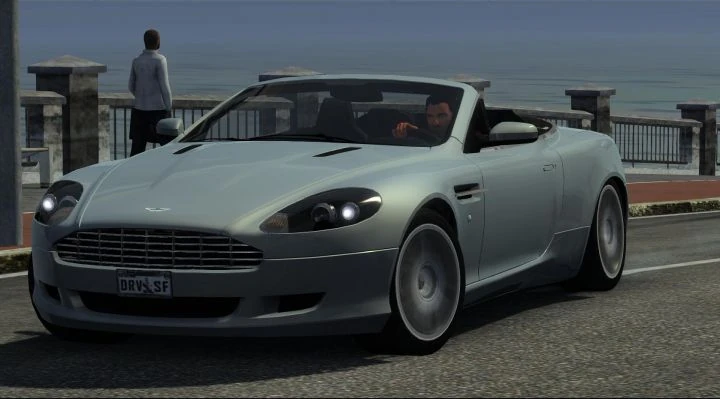
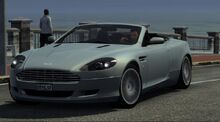
+ | |[[File:Aston Martin DB9.jpg|thumb|220x220px]] |
|DB9 Volante |
|DB9 Volante |
||
|50,000 |
|50,000 |
||
| + | |[[File:Vehicles in Driver- San Francisco-0.png|thumb|220x220px]] |
||
| − | | |
||
|[[File:Picture22.jpg|none|thumb|228x228px]] |
|[[File:Picture22.jpg|none|thumb|228x228px]] |
||
|- |
|- |
||
| − | |[[File: |
+ | |[[File:098.jpg|thumb|220x220px]] |
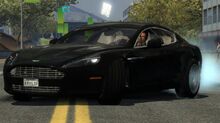
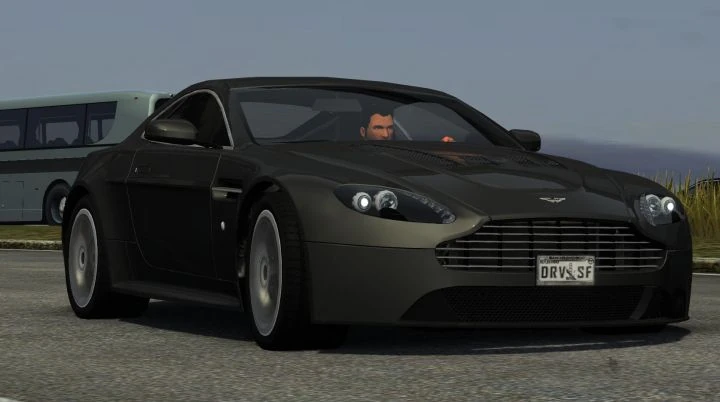
|Rapide |
|Rapide |
||
|75,000 |
|75,000 |
||
| + | |[[File:Vehicles in Driver- San Francisco-1.png|thumb|220x220px]] |
||
| − | | |
||
|[[File:Picture20.png|none|thumb|224x224px]] |
|[[File:Picture20.png|none|thumb|224x224px]] |
||
|- |
|- |
||
| − | |[[File: |
+ | |[[File:345.jpg|thumb|220x220px]] |
|V12 Vantage |
|V12 Vantage |
||
|90,000 |
|90,000 |
||
| + | |[[File:Vehicles in Driver- San Francisco-2.png|thumb|220x220px]] |
||
| − | | |
||
|[[File:Picture24.jpg|none|thumb|227x227px]] |
|[[File:Picture24.jpg|none|thumb|227x227px]] |
||
|- |
|- |
||
| + | |[[File:988.jpg|thumb|220x220px]] |
||
| − | | |
||
|DB5 |
|DB5 |
||
|100,000 |
|100,000 |
||
| + | |[[File:Vehicles in Driver- San Francisco-3.png|thumb|220x220px]] |
||
| |
| |
||
| + | |}[[File:Picture25.png|thumb|95x95px]] |
||
| − | | |
||
| − | |} |
||
| − | [[File:Picture25.png|thumb|95x95px]] |
||
== [[Audi]] == |
== [[Audi]] == |
||
| Line 158: | Line 158: | ||
!Stats |
!Stats |
||
|- |
|- |
||
| − | |[[File: |
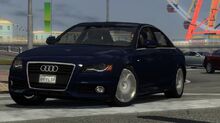
+ | |[[File:501.jpg|thumb|220x220px]] |
|A4 2.0 TFSI |
|A4 2.0 TFSI |
||
|8,000 |
|8,000 |
||
| + | |[[File:Audi A4 Cockpit.png|thumb|220x220px]] |
||
| − | | |
||
|[[File:Picture27.jpg|none|thumb|231x231px]] |
|[[File:Picture27.jpg|none|thumb|231x231px]] |
||
|- |
|- |
||
| − | |[[File: |
+ | |[[File:779.jpg|thumb|220x220px]] |
|Q7 4.2 FSI Quattro |
|Q7 4.2 FSI Quattro |
||
|10,000 |
|10,000 |
||
| + | |[[File:Audi Q7 Cockpit.png|thumb|220x220px]] |
||
| − | | |
||
|[[File:Picture29.png|none|thumb|231x231px]] |
|[[File:Picture29.png|none|thumb|231x231px]] |
||
|- |
|- |
||
| − | |[[File: |
+ | |[[File:815.jpg|thumb|220x220px]] |
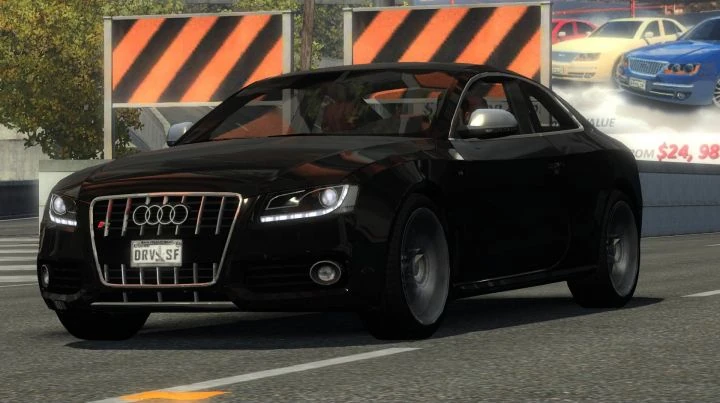
|S5 |
|S5 |
||
Coupé |
Coupé |
||
|15,000 |
|15,000 |
||
| + | |[[File:Vehicles in Driver- San Francisco-1540306699.png|thumb|220x220px]] |
||
| − | | |
||
|[[File:Picture39.png|none|thumb|229x229px]] |
|[[File:Picture39.png|none|thumb|229x229px]] |
||
|- |
|- |
||
| − | |[[File: |
+ | |[[File:486.jpg|thumb|220x220px]] |
|TT RS Coupé |
|TT RS Coupé |
||
|20,000 |
|20,000 |
||
| + | |[[File:Audi TT RS Cockpit.png|thumb|220x220px]] |
||
| − | | |
||
|[[File:Picture43.png|none|thumb|229x229px]] |
|[[File:Picture43.png|none|thumb|229x229px]] |
||
|- |
|- |
||
| − | |[[File: |
+ | |[[File:833.jpg|thumb|220x220px]] |
|RS 6 |
|RS 6 |
||
Avant |
Avant |
||
|40,000 |
|40,000 |
||
| + | |[[File:Vehicles in Driver- San Francisco-1540306722.png|thumb|220x220px]] |
||
| − | | |
||
|[[File:Picture45.png|none|thumb|226x226px]] |
|[[File:Picture45.png|none|thumb|226x226px]] |
||
|- |
|- |
||
| − | |[[File: |
+ | |[[File:324-0.jpg|thumb|220x220px]] |
|R8 5.2 FSI Quattro |
|R8 5.2 FSI Quattro |
||
|130,000 |
|130,000 |
||
| + | |[[File:R8 Cockpit View.png|thumb|220x220px]] |
||
| − | | |
||
|[[File:Picture47.png|none|thumb|228x228px]] |
|[[File:Picture47.png|none|thumb|228x228px]] |
||
|- |
|- |
||
| − | |[[File: |
+ | |[[File:370.jpg|thumb|220x220px]] |
|Sport Quattro S1 |
|Sport Quattro S1 |
||
|150,000 |
|150,000 |
||
| + | |[[File:Vehicles in Driver- San Francisco-1540306746.png|thumb|220x220px]] |
||
| |
| |
||
| + | |} |
||
| − | |[[File:Picture49.png|none|thumb|229x229px]] |
||
| + | |||
| + | == [[ASYM]] == |
||
| + | {| class="article-table" |
||
| + | !Picture |
||
| + | !Name |
||
| + | !Willpowercost |
||
| + | !Cockpit view |
||
| + | !Stats |
||
| + | |- |
||
| + | |[[File:163.jpg|thumb|220x220px]] |
||
| + | |Desanne |
||
| + | 3.0T |
||
| + | |5,000 |
||
| + | |[[File:Screenshot (56).png|thumb|220x220px]] |
||
| + | |[[File:Asym dessane.PNG|thumb|220x220px]] |
||
| + | |- |
||
| + | |[[File:502.jpg|thumb|220x220px]] |
||
| + | |Desanne |
||
| + | X/T Pursuit |
||
| + | |5,000 |
||
| + | |[[File:Screenshot (58).png|thumb|220x220px]] |
||
| + | |[[File:Asym dessane.PNG|thumb|220x220px]] |
||
| + | |- |
||
| + | |[[File:500px-ASYM Desanne LX (Driver- San Francisco).png|thumb|220x220px]] |
||
| + | |Desanne |
||
| + | LX |
||
| + | |5,000 |
||
| + | |[[File:Screenshot (57).png|thumb|220x220px]] |
||
| + | |[[File:Asym dessane.PNG|thumb|220x220px]] |
||
|} |
|} |
||
[[File:Picture50.png|thumb|110x110px]] |
[[File:Picture50.png|thumb|110x110px]] |
||
| Line 213: | Line 243: | ||
!Stats |
!Stats |
||
|- |
|- |
||
| − | |[[File: |
+ | |[[File:847.jpg|thumb|220x220px]] |
|Arnage T |
|Arnage T |
||
|150,000 |
|150,000 |
||
| + | |[[File:Vehicles in Driver- San Francisco-1540307060.png|thumb|220x220px]] |
||
| − | | |
||
|[[File:Picture52.png|none|thumb|219x219px]] |
|[[File:Picture52.png|none|thumb|219x219px]] |
||
|- |
|- |
||
| − | |[[File: |
+ | |[[File:327.jpg|thumb|220x220px]] |
|Continental Supersports |
|Continental Supersports |
||
|200,000 |
|200,000 |
||
| + | |[[File:.png|thumb|220x220px]] |
||
| − | | |
||
|[[File:Picture54.png|none|thumb|222x222px]] |
|[[File:Picture54.png|none|thumb|222x222px]] |
||
| + | |}[[File:Picture55.png|thumb|65x65px]] |
||
| − | |} |
||
| − | [[File:Picture55.png|thumb|65x65px]] |
||
== [[Cadillac]] == |
== [[Cadillac]] == |
||
| Line 237: | Line 266: | ||
!Stats |
!Stats |
||
|- |
|- |
||
| − | |[[File: |
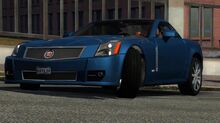
+ | |[[File:513.jpg|thumb|220x220px]] |
|DTS |
|DTS |
||
|1,000 |
|1,000 |
||
| + | |[[File:Vehicles in Driver- San Francisco-1540308058.png|thumb|220x220px]] |
||
| − | | |
||
|[[File:Picture57.png|none|thumb|217x217px]] |
|[[File:Picture57.png|none|thumb|217x217px]] |
||
|- |
|- |
||
| − | |[[File: |
+ | |[[File:307.jpg|thumb|220x220px]] |
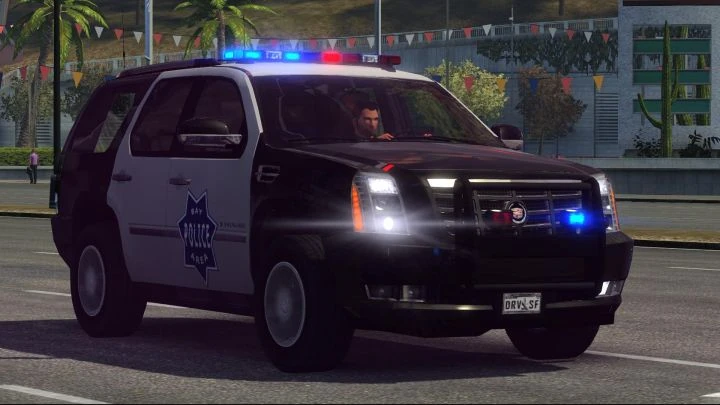
|Escalade (Civilian) |
|Escalade (Civilian) |
||
|1,000 |
|1,000 |
||
| + | |[[File:Vehicles in Driver- San Francisco-1540308090.png|thumb|220x220px]] |
||
| − | | |
||
|[[File:Picture59.png|none|thumb|215x215px]] |
|[[File:Picture59.png|none|thumb|215x215px]] |
||
|- |
|- |
||
| − | |[[File: |
+ | |[[File:518.jpg|thumb|220x220px]] |
|CTS-V |
|CTS-V |
||
|5,000 |
|5,000 |
||
| + | |[[File:Vehicles in Driver- San Francisco-1540308117.png|thumb|220x220px]] |
||
| − | | |
||
|[[File:Picture61.png|none|thumb|210x210px]] |
|[[File:Picture61.png|none|thumb|210x210px]] |
||
|- |
|- |
||
| − | |[[File: |
+ | |[[File:570.jpg|thumb|220x220px]] |
|XLR-V |
|XLR-V |
||
|5,000 |
|5,000 |
||
| + | |[[File:Vehicles in Driver- San Francisco-1540308279.png|thumb|220x220px]] |
||
| − | | |
||
|[[File:Picture63.png|none|thumb|217x217px]] |
|[[File:Picture63.png|none|thumb|217x217px]] |
||
|- |
|- |
||
| − | |[[File: |
+ | |[[File:086.jpg|thumb|220x220px]] |
|Eldorado |
|Eldorado |
||
|10,000 |
|10,000 |
||
| + | |[[File:Vehicles in Driver- San Francisco-1540308318.png|thumb|220x220px]] |
||
| − | | |
||
|[[File:Picture65.png|none|thumb|218x218px]] |
|[[File:Picture65.png|none|thumb|218x218px]] |
||
|- |
|- |
||
| − | |[[File: |
+ | |[[File:371.jpg|thumb|220x220px]] |
|Escalade (Cop) |
|Escalade (Cop) |
||
|15,000 |
|15,000 |
||
| + | |[[File:Vehicles in Driver- San Francisco-1540308345.png|thumb|220x220px]] |
||
| − | | |
||
|[[File:Picture67.png|none|thumb|220x220px]] |
|[[File:Picture67.png|none|thumb|220x220px]] |
||
|} |
|} |
||
[[File:Picture68.png|thumb|125x125px]] |
[[File:Picture68.png|thumb|125x125px]] |
||
| − | == Caisson == |
+ | == [[Caisson]] == |
{| class="article-table" |
{| class="article-table" |
||
!Picture |
!Picture |
||
| Line 284: | Line 313: | ||
!Stats |
!Stats |
||
|- |
|- |
||
| − | |[[File: |
+ | |[[File:617.jpg|thumb|220x220px]] |
|Fairview |
|Fairview |
||
|1,000 |
|1,000 |
||
| + | |[[File:Fairview Cockpit.png|thumb|220x220px]] |
||
| − | | |
||
|[[File:Picture70.png|none|thumb|229x229px]] |
|[[File:Picture70.png|none|thumb|229x229px]] |
||
|- |
|- |
||
| − | |[[File: |
+ | |[[File:218.jpg|thumb|220x220px]] |
|Whippet |
|Whippet |
||
|3,000 |
|3,000 |
||
| Line 296: | Line 325: | ||
|[[File:Picture72.png|none|thumb|224x224px]] |
|[[File:Picture72.png|none|thumb|224x224px]] |
||
|- |
|- |
||
| − | |[[File: |
+ | |[[File:243.jpg|thumb|220x220px]] |
|Elementary C |
|Elementary C |
||
|5,000 |
|5,000 |
||
| Line 314: | Line 343: | ||
!Stats |
!Stats |
||
|- |
|- |
||
| − | |[[File: |
+ | |[[File:764.jpg|thumb|220x220px]] |
|Hydramax 505 |
|Hydramax 505 |
||
|5,000 |
|5,000 |
||
| + | |[[File:Hydramax 505 Cockpit.png|thumb|220x220px]] |
||
| − | | |
||
|[[File:Picture79.png|none|thumb|237x237px]] |
|[[File:Picture79.png|none|thumb|237x237px]] |
||
|- |
|- |
||
| − | |[[File: |
+ | |[[File:096.jpg|thumb|220x220px]] |
|Hydramax AERV |
|Hydramax AERV |
||
|10,000 |
|10,000 |
||
| + | |[[File:Hydramax AERV Cockpit View.png|thumb|220x220px]] |
||
| − | | |
||
|[[File:Picture77.png|none|thumb|235x235px]] |
|[[File:Picture77.png|none|thumb|235x235px]] |
||
|} |
|} |
||
[[File:Picture80.png|thumb|158x158px]] |
[[File:Picture80.png|thumb|158x158px]] |
||
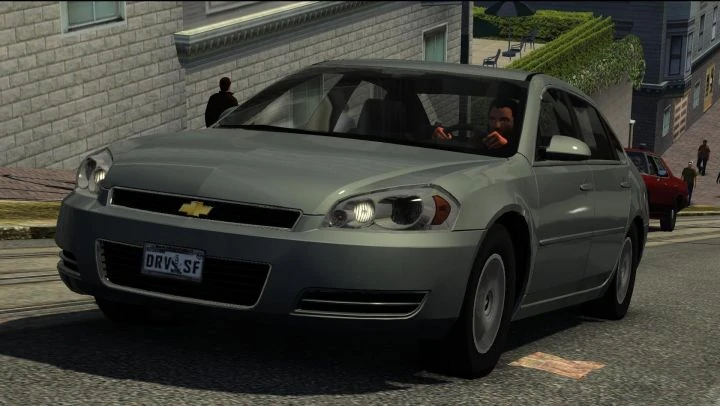
| − | == Chevrolet == |
+ | == [[Chevrolet]] == |
{| class="article-table" |
{| class="article-table" |
||
!Picture |
!Picture |
||
| Line 337: | Line 366: | ||
!Stats |
!Stats |
||
|- |
|- |
||
| − | |[[File: |
+ | |[[File:173.jpg|thumb|220x220px]] |
|Impala (Civilian) |
|Impala (Civilian) |
||
|500 |
|500 |
||
| + | |[[File:Vehicles in Driver- San Francisco-1540308703.png|thumb|220x220px]] |
||
| − | | |
||
|[[File:Picture82.png|none|thumb|238x238px]] |
|[[File:Picture82.png|none|thumb|238x238px]] |
||
|- |
|- |
||
| − | |[[File: |
+ | |[[File:789.jpg|thumb|220x220px]] |
|Impala (Taxi) |
|Impala (Taxi) |
||
|500 |
|500 |
||
| Line 349: | Line 378: | ||
|[[File:Picture84.png|none|thumb|237x237px]] |
|[[File:Picture84.png|none|thumb|237x237px]] |
||
|- |
|- |
||
| − | |[[File: |
+ | |[[File:140.jpg|thumb|220x220px]] |
|Blazer |
|Blazer |
||
|1,000 |
|1,000 |
||
| + | |[[File:Vehicles in Driver- San Francisco-1540308746.png|thumb|220x220px]] |
||
| − | | |
||
|[[File:Picture86.png|none|thumb|220x220px]] |
|[[File:Picture86.png|none|thumb|220x220px]] |
||
|- |
|- |
||
| − | |[[File: |
+ | |[[File:493.jpg|thumb|220x220px]] |
| − | |C10 ( |
+ | |C10 (Pickup) |
|1,000 |
|1,000 |
||
| + | |[[File:Vehicles in Driver- San Francisco-1540309205.png|thumb|220x220px]] |
||
| − | | |
||
|[[File:Picture88.png|none|thumb|220x220px]] |
|[[File:Picture88.png|none|thumb|220x220px]] |
||
|- |
|- |
||
| − | |[[File: |
+ | |[[File:236.jpg|thumb|220x220px]] |
|Volt |
|Volt |
||
|2,500 |
|2,500 |
||
| + | |[[File:Vehicles in Driver- San Francisco-1540309229.png|thumb|220x220px]] |
||
| − | | |
||
|[[File:Picture90.png|none|thumb|220x220px]] |
|[[File:Picture90.png|none|thumb|220x220px]] |
||
|- |
|- |
||
| − | |[[File: |
+ | |[[File:757.jpg|thumb|220x220px]] |
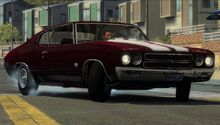
|Chevelle SS |
|Chevelle SS |
||
|5,000 |
|5,000 |
||
| + | |[[File:Vehicles in Driver- San Francisco-1540309253.png|thumb|220x220px]] |
||
| − | | |
||
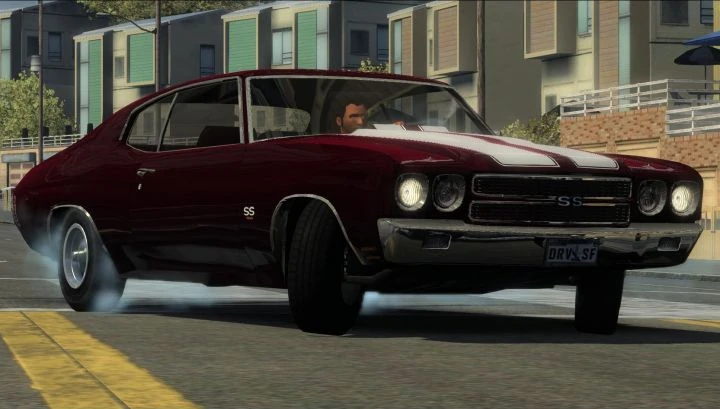
|[[File:Chevelle SS Stats.png|thumb|220x220px]] |
|[[File:Chevelle SS Stats.png|thumb|220x220px]] |
||
|- |
|- |
||
| − | |[[File: |
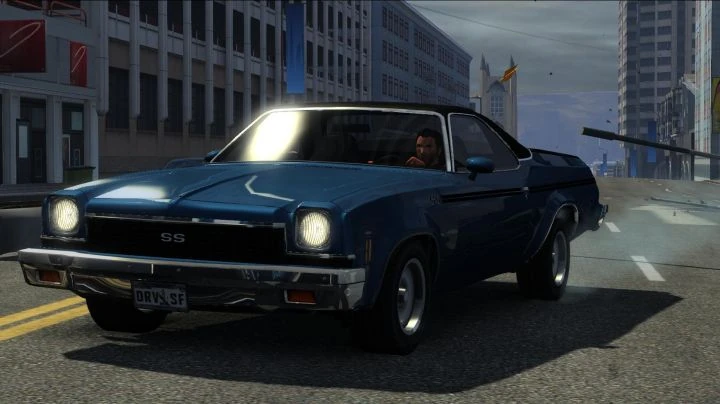
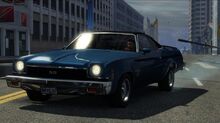
+ | |[[File:993.jpg|thumb|220x220px]] |
|El Camino |
|El Camino |
||
|5,000 |
|5,000 |
||
| + | |[[File:Vehicles in Driver- San Francisco-1540309307.png|thumb|220x220px]] |
||
| − | | |
||
|[[File:El Camino Stats.png|thumb|218x218px]] |
|[[File:El Camino Stats.png|thumb|218x218px]] |
||
|- |
|- |
||
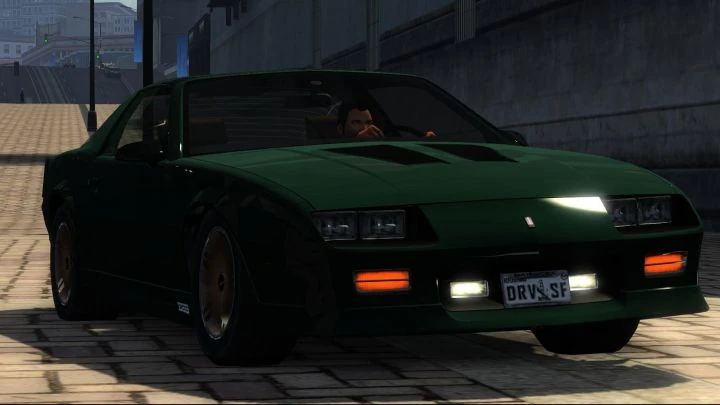
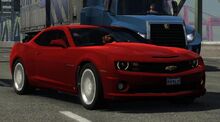
| + | |[[File:734.jpg|thumb|220x220px]] |
||
| − | | |
||
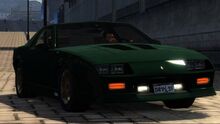
|Camaro Z28 |
|Camaro Z28 |
||
|10,000 |
|10,000 |
||
| + | |[[File:Z28 Interior.png|thumb|220x220px]] |
||
| − | | |
||
| + | |[[File:Z28 Stats.png|thumb|220x220px]] |
||
| − | | |
||
|- |
|- |
||
| − | |[[File: |
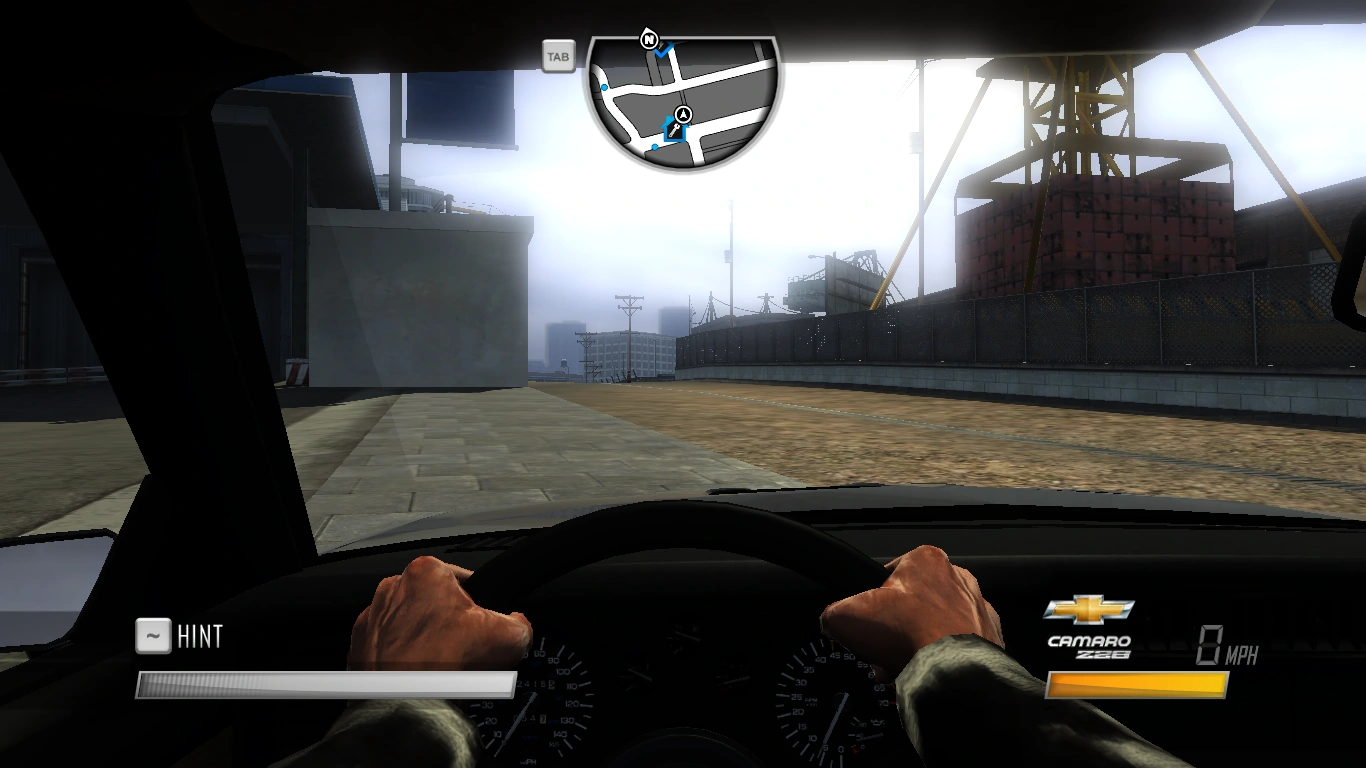
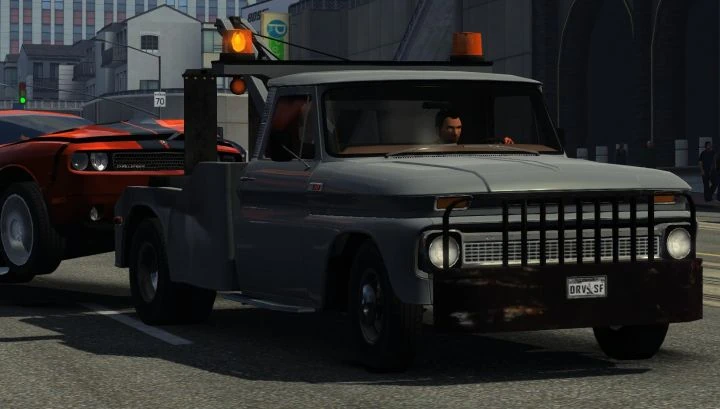
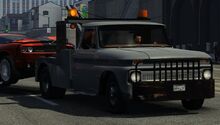
+ | |[[File:515.jpg|thumb|220x220px]] |
|C10 (Tow Truck) |
|C10 (Tow Truck) |
||
|10,000 |
|10,000 |
||
| + | |[[File:Chevrolet C-10 Tow Cockpit.png|thumb|220x220px]] |
||
| − | | |
||
|[[File:C-10 Truck Stats.png|thumb|220x220px]] |
|[[File:C-10 Truck Stats.png|thumb|220x220px]] |
||
|- |
|- |
||
| + | |[[File:991.jpg|thumb|220x220px]] |
||
| − | | |
||
| − | |Camaro SS ( |
+ | |Camaro SS (2010) |
|20,000 |
|20,000 |
||
| + | |[[File:Vehicles in Driver- San Francisco-1540310081.png|thumb|220x220px]] |
||
| − | | |
||
| |
| |
||
|- |
|- |
||
| + | |[[File:056.jpg|thumb|220x220px]] |
||
| − | | |
||
|Bel Air |
|Bel Air |
||
|30,000 |
|30,000 |
||
| + | |[[File:Vehicles in Driver- San Francisco-1540309341.png|thumb|220x220px]] |
||
| − | | |
||
| |
| |
||
|- |
|- |
||
| − | |[[File: |
+ | |[[File:238.jpg|thumb|220x220px]] |
| − | |Camaro SS ( |
+ | |Camaro SS (1968) |
|30,000 |
|30,000 |
||
| + | |[[File:Vehicles in Driver- San Francisco-1540309362.png|thumb|220x220px]] |
||
| − | | |
||
|[[File:Camaro SS Stats.png|thumb|220x220px]] |
|[[File:Camaro SS Stats.png|thumb|220x220px]] |
||
|- |
|- |
||
| + | |[[File:057.jpg|thumb|220x220px]] |
||
| − | | |
||
|Corvette |
|Corvette |
||
|50,000 |
|50,000 |
||
| + | |[[File:Vehicles in Driver- San Francisco-1540310107.png|thumb|220x220px]] |
||
| − | | |
||
| |
| |
||
|- |
|- |
||
| − | |[[File: |
+ | |[[File:333.jpg|thumb|220x220px]] |
|Corvette Z06 Drift |
|Corvette Z06 Drift |
||
|100,000 |
|100,000 |
||
| + | |[[File:Vehicles in Driver- San Francisco-1540310132.png|thumb|220x220px]] |
||
| − | | |
||
|[[File:Z06 Drift Stats.png|thumb|220x220px]] |
|[[File:Z06 Drift Stats.png|thumb|220x220px]] |
||
|- |
|- |
||
| + | |[[File:455.jpg|thumb|220x220px]] |
||
| − | | |
||
|Corvette ZR 1 (Civilian) |
|Corvette ZR 1 (Civilian) |
||
|115,000 |
|115,000 |
||
| + | |[[File:Vehicles in Driver- San Francisco-1540310160.png|thumb|220x220px]] |
||
| − | | |
||
| |
| |
||
|- |
|- |
||
| + | |[[File:512.jpg|thumb|220x220px]] |
||
| − | | |
||
|Corvette ZR 1 (Cop) |
|Corvette ZR 1 (Cop) |
||
|130,000 |
|130,000 |
||
| + | |[[File:Vehicles in Driver- San Francisco-1540310182.png|thumb|220x220px]] |
||
| − | | |
||
| |
| |
||
|} |
|} |
||
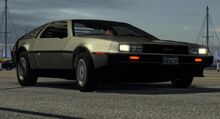
[[File:Delorean Logo.png|thumb|205x205px]] |
[[File:Delorean Logo.png|thumb|205x205px]] |
||
| − | == Delorean == |
+ | == [[DeLorean Motor Company|Delorean]] == |
{| class="article-table" |
{| class="article-table" |
||
|'''Picture''' |
|'''Picture''' |
||
| Line 444: | Line 473: | ||
|'''Stats''' |
|'''Stats''' |
||
|- |
|- |
||
| − | |[[File: |
+ | |[[File:314.jpg|thumb|220x220px]] |
|DMC-12 |
|DMC-12 |
||
|10,000 |
|10,000 |
||
| + | |[[File:Vehicles in Driver- San Francisco-1540310418.png|thumb|220x220px]] |
||
| − | | |
||
|[[File:Delorean DMC-12 Stats.png|thumb|220x220px]] |
|[[File:Delorean DMC-12 Stats.png|thumb|220x220px]] |
||
|} |
|} |
||
| Line 460: | Line 489: | ||
|'''Stats''' |
|'''Stats''' |
||
|- |
|- |
||
| − | |[[File: |
+ | |[[File:340.jpg|thumb|220x220px]] |
|Challenger |
|Challenger |
||
R/T (1970) |
R/T (1970) |
||
| Line 467: | Line 496: | ||
|[[File:T Stats.png|thumb|220x220px]] |
|[[File:T Stats.png|thumb|220x220px]] |
||
|- |
|- |
||
| − | |[[File: |
+ | |[[File:526.jpg|thumb|220x220px]] |
|Grand |
|Grand |
||
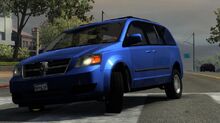
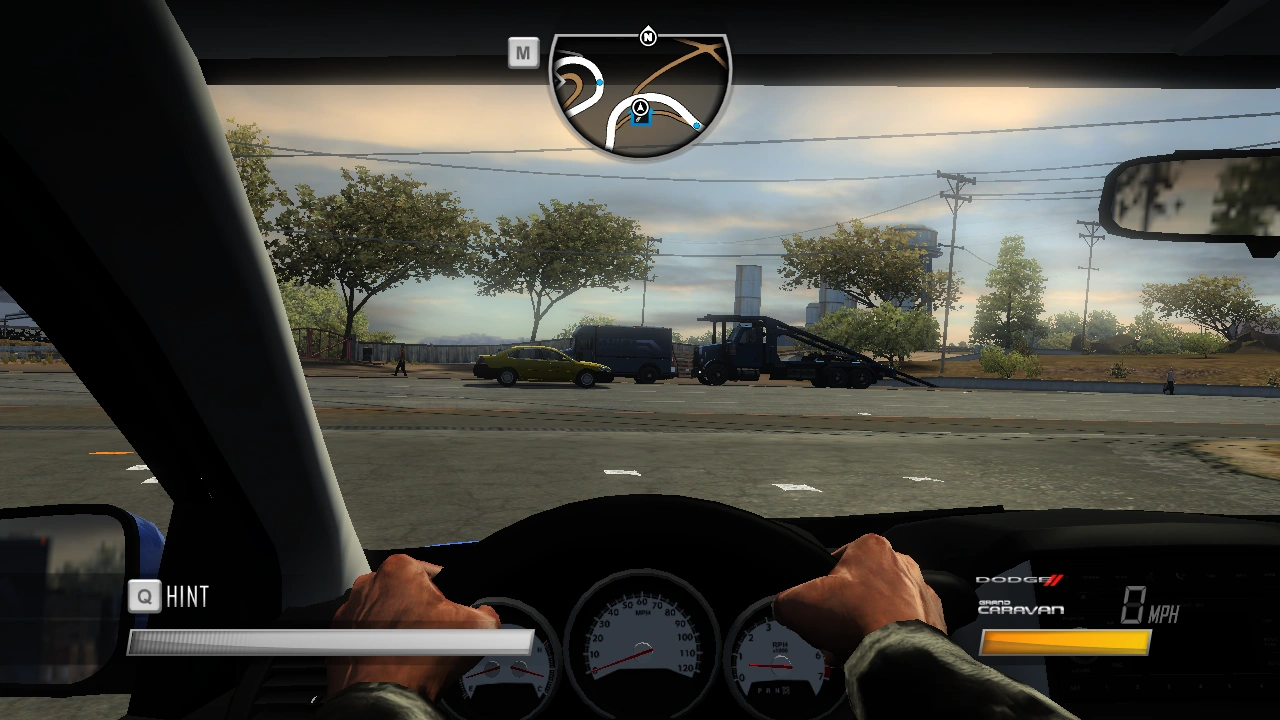
Caravan |
Caravan |
||
| + | |||
| + | (Civilian) |
||
|500 |
|500 |
||
| + | |[[File:Vehicles in Driver- San Francisco-1540310813.png|thumb|220x220px]] |
||
| − | | |
||
|[[File:Grand Caravan Stats.png|thumb|220x220px]] |
|[[File:Grand Caravan Stats.png|thumb|220x220px]] |
||
|- |
|- |
||
| − | |[[File: |
+ | |[[File:527.jpg|thumb|220x220px]] |
|Grand |
|Grand |
||
Caravan (Taxi) |
Caravan (Taxi) |
||
|500 |
|500 |
||
| + | |[[File:Vehicles in Driver- San Francisco-1540310836.png|thumb|220x220px]] |
||
| − | | |
||
|[[File:Grand Caravan Taxi Stats.png|thumb|220x220px]] |
|[[File:Grand Caravan Taxi Stats.png|thumb|220x220px]] |
||
|- |
|- |
||
| + | |[[File:328.jpg|thumb|220x220px]] |
||
| − | | |
||
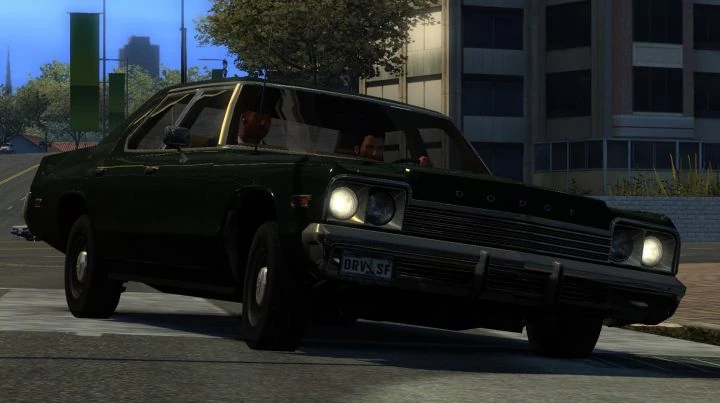
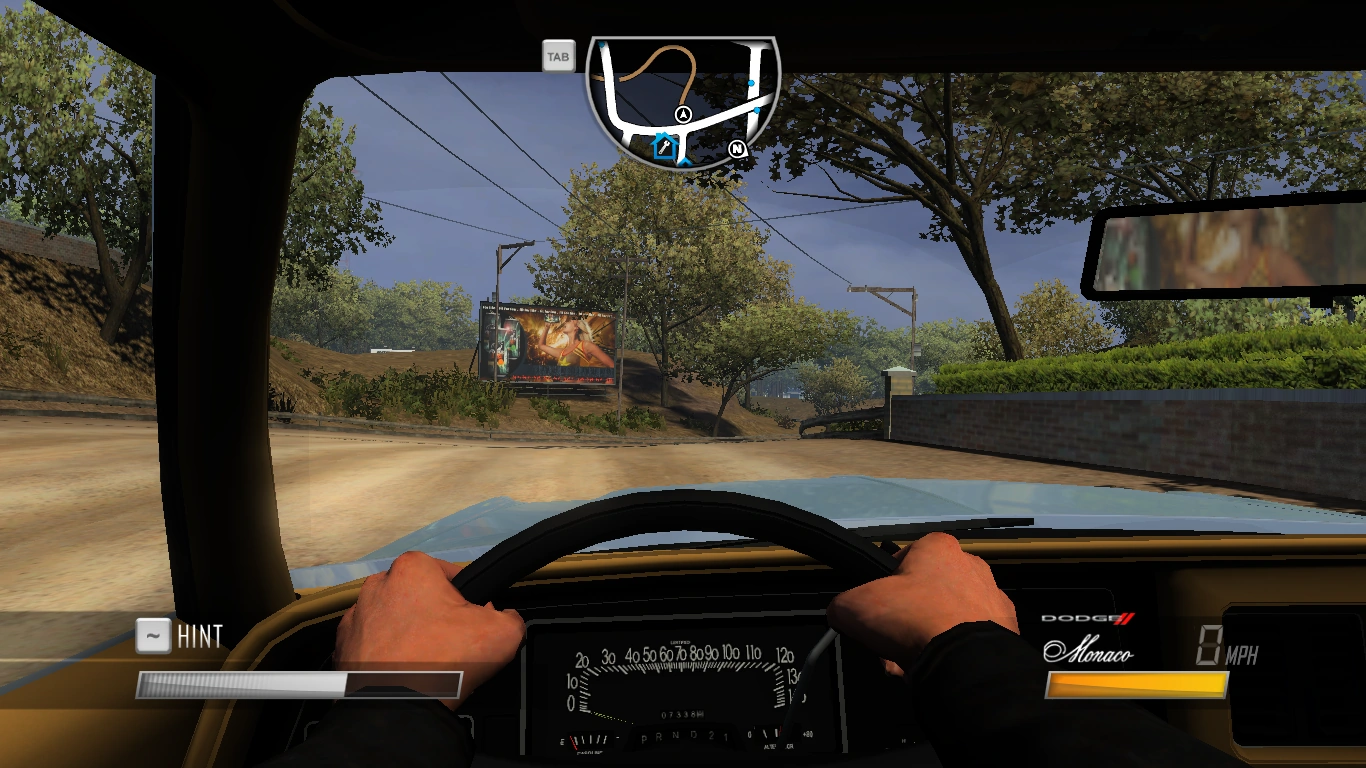
|Monaco |
|Monaco |
||
| + | (Civilian) |
||
|500 |
|500 |
||
|[[File:Monaco Cockpit View.png|thumb|220x220px]] |
|[[File:Monaco Cockpit View.png|thumb|220x220px]] |
||
| |
| |
||
|- |
|- |
||
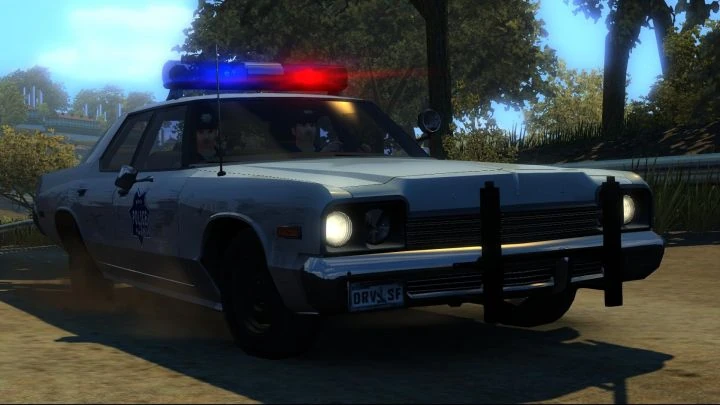
| − | |[[File: |
+ | |[[File:333-0.jpg|thumb|220x220px]] |
| + | |Monaco |
||
| + | (Cop) |
||
| + | | |
||
| + | | |
||
| + | | |
||
| + | |- |
||
| + | |[[File:316.jpg|thumb|220x220px]] |
||
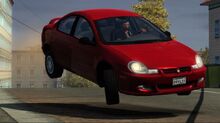
|Neon |
|Neon |
||
|500 |
|500 |
||
| + | |[[File:Vehicles in Driver- San Francisco-1540311285.png|thumb|220x220px]] |
||
| − | | |
||
|[[File:Dodge Neon Stats.png|thumb|220x220px]] |
|[[File:Dodge Neon Stats.png|thumb|220x220px]] |
||
|- |
|- |
||
| − | |[[File: |
+ | |[[File:516.jpg|thumb|220x220px]] |
|Charger |
|Charger |
||
SRT8 |
SRT8 |
||
| + | |||
| + | (Civilian) |
||
|1,000 |
|1,000 |
||
| + | |[[File:Vehicles in Driver- San Francisco-1540311304.png|thumb|220x220px]] |
||
| − | | |
||
|[[File:Charger SRT8 Stats.png|thumb|220x220px]] |
|[[File:Charger SRT8 Stats.png|thumb|220x220px]] |
||
|- |
|- |
||
| + | |[[File:339.jpg|thumb|220x220px]] |
||
| − | | |
||
|Charger |
|Charger |
||
SRT8 (Police) |
SRT8 (Police) |
||
|1,000 |
|1,000 |
||
| + | |[[File:Vehicles in Driver- San Francisco-1540311329.png|thumb|220x220px]] |
||
| − | | |
||
| |
| |
||
|- |
|- |
||
| − | |[[File: |
+ | |[[File:329.jpg|thumb|220x220px]] |
|Challenger |
|Challenger |
||
| + | SRT-8 |
||
| − | SRT8 |
||
|2,000 |
|2,000 |
||
| + | |[[File:Vehicles in Driver- San Francisco-1540311348.png|thumb|220x220px]] |
||
| − | | |
||
|[[File:Challenger SRT8 Stats.png|thumb|220x220px]] |
|[[File:Challenger SRT8 Stats.png|thumb|220x220px]] |
||
|- |
|- |
||
| − | |[[File: |
+ | |[[File:313.jpg|thumb|220x220px]] |
|Charger |
|Charger |
||
R/T (1969) |
R/T (1969) |
||
|15,000 |
|15,000 |
||
| + | |[[File:T Cockpit View.png|thumb|220x220px]] |
||
| − | | |
||
|[[File:T Stats-0.png|thumb|220x220px]] |
|[[File:T Stats-0.png|thumb|220x220px]] |
||
|- |
|- |
||
| + | |[[File:Vehicles in Driver- San Francisco-1540311999.png|thumb|220x220px]] |
||
| − | | |
||
| − | |Viper |
+ | |Viper |
ACR |
ACR |
||
| − | |100,000 |
||
| |
| |
||
| |
| |
||
| − | |} |
||
| − | |||
| − | == Dykemann == |
||
| − | {| class="article-table" |
||
| − | |'''Picture''' |
||
| − | |'''Name''' |
||
| − | |<nowiki/>''<nowiki/>'''''Willpower'''''<nowiki/>'''''cost''' |
||
| − | |<nowiki/>'''Cockpit''''''View''' |
||
| − | |'''Stats''' |
||
| − | |- |
||
| |
| |
||
| + | |-} |
||
| − | |Bison |
||
| − | 453 |
||
| − | |1,000 |
||
| − | | |
||
| − | | |
||
| − | |- |
||
| − | | |
||
| − | |Dolva |
||
| − | R-575 |
||
| − | |1,000 |
||
| − | |[[File:Dykemann Dolva R-575 Cockpit Cam.png|thumb|220x220px]] |
||
| − | | |
||
| − | |- |
||
| − | | |
||
| − | |C-575 |
||
| − | |5,000 |
||
| − | | |
||
| − | | |
||
| − | |- |
||
| − | | |
||
| − | |Dolva |
||
| − | S-575 |
||
| − | |5,000 |
||
| − | | |
||
| − | | |
||
| − | |- |
||
| − | | |
||
| − | |Dolva |
||
| − | T-575 |
||
| − | |5,000 |
||
| − | |[[File:Dykemann Dolva T-575 Cockpit View.png|thumb|220x220px]] |
||
| − | | |
||
| − | |- |
||
| − | | |
||
| − | |Boldius |
||
| − | 278 |
||
| − | |10,000 |
||
| − | | |
||
| − | | |
||
| − | |- |
||
| − | | |
||
| − | |Haulier |
||
| − | SF |
||
| − | |20,000 |
||
| − | | |
||
| − | | |
||
| − | |} |
||
| − | |||
| − | == [[Ford]] == |
||
| − | {| class="article-table" |
||
| − | |'''Picture''' |
||
| − | |'''Name''' |
||
| − | |'''Willpower''''''cost''' |
||
| − | |'''Cockpit''''''View''' |
||
| − | |'''Stats''' |
||
| − | |- |
||
| − | |[[File:Crown Victoria.png|thumb|220x220px]] |
||
| − | |Crown |
||
| − | Victoria |
||
| − | |500 |
||
| − | | |
||
| − | |[[File:Crown Victoria Stats.png|thumb|220x220px]] |
||
| − | |- |
||
| − | |[[File:Crown Victoria Taxi.png|thumb|220x220px]] |
||
| − | |Crown |
||
| − | Victoria |
||
| − | |||
| − | (Taxi) |
||
| − | |500 |
||
| − | | |
||
| − | |[[File:Crown Victoria Taxi Stats.png|thumb|220x220px]] |
||
| − | |- |
||
| − | |[[File:Ford Taurus.png|thumb|220x220px]] |
||
| − | |Taurus SHO |
||
| − | |500 |
||
| − | |[[File:Ford Taurus Cockpit View.png|thumb|220x220px]] |
||
| − | |[[File:Taurus Stats.png|thumb|220x220px]] |
||
| − | |- |
||
| − | | |
||
| − | |Crown |
||
| − | Victoria |
||
| − | |||
| − | (Police) |
||
| − | |1,000 |
||
| − | | |
||
| − | | |
||
| − | |- |
||
| − | | |
||
| − | |Mustang |
||
| − | |||
| − | Convertible |
||
| − | |2,000 |
||
| − | | |
||
| − | | |
||
| − | |- |
||
| − | | |
||
| − | |F-150 XLT |
||
| − | |||
| − | Supercrew |
||
| − | |3,000 |
||
| − | | |
||
| − | | |
||
| − | |- |
||
| − | | |
||
| − | |F-350 |
||
| − | |||
| − | Super Duty |
||
| − | |4,000 |
||
| − | | |
||
| − | | |
||
| − | |- |
||
| − | |[[File:Gran Torino .png|thumb|220x220px]] |
||
| − | |Gran Torino |
||
| − | |5,000 |
||
| − | | |
||
| − | |[[File:Gran Torino Stats.png|thumb|220x220px]] |
||
| − | |- |
||
| − | | |
||
| − | |Mustang |
||
| − | |||
| − | Mach 1 |
||
| − | |10,000 |
||
| − | | |
||
| − | | |
||
| − | |- |
||
| − | | |
||
| − | |Mustang GT |
||
| − | |||
| − | Fastback (Old) |
||
| − | |20,000 |
||
| − | | |
||
| − | | |
||
| − | |- |
||
| − | | |
||
| − | |Shelby GT-500 |
||
| − | |||
| − | (New) |
||
| − | |40,000 |
||
| − | | |
||
| − | | |
||
| − | |- |
||
| − | |[[File:Ford GT.png|thumb|220x220px]] |
||
| − | |GT |
||
| − | |150,000 |
||
| − | | |
||
| − | |[[File:Ford GT Stats.png|thumb|220x220px]] |
||
| − | |- |
||
| − | | |
||
| − | |RS200 |
||
| − | |150,000 |
||
| − | | |
||
| − | | |
||
| − | |} |
||
| − | [[File:GMC-emblem-6.jpg|thumb|220x220px]] |
||
| − | |||
| − | == GMC == |
||
| − | {| class="article-table" |
||
| − | |'''Picture''' |
||
| − | |'''Name''' |
||
| − | |'''Willpower''''''Cost''' |
||
| − | |'''Cockpit''''''View''' |
||
| − | |'''Stats''' |
||
| − | |- |
||
| − | | |
||
| − | |C5500 |
||
| − | |1,000 |
||
| − | | |
||
| − | | |
||
| − | |- |
||
| − | | |
||
| − | |Savana |
||
| − | |2,000 |
||
| − | | |
||
| − | | |
||
| − | |- |
||
| − | | |
||
| − | |C5500 |
||
| − | (Ambulance) |
||
| − | |5,000 |
||
| − | | |
||
| − | | |
||
| − | |- |
||
| − | | |
||
| − | |Sierra |
||
| − | |5,000 |
||
| − | | |
||
| − | | |
||
| − | |- |
||
| − | | |
||
| − | |Vandura |
||
| − | |10,000 |
||
| − | | |
||
| − | | |
||
| − | |- |
||
| − | | |
||
| − | |Sierra |
||
| − | (Jacked-Up) |
||
| − | |30,000 |
||
| − | | |
||
| − | | |
||
| − | |} |
||
| − | [[File:Hudson Logo.jpg|thumb|148x148px]] |
||
| − | |||
| − | == Hudson == |
||
| − | {| class="article-table" |
||
| − | |'''Picture''' |
||
| − | |'''Name''' |
||
| − | |'''Willpower''''''cost''' |
||
| − | |'''Cockpit''''''View''' |
||
| − | |'''Stats''' |
||
| − | |- |
||
| − | | |
||
| − | |Hornet |
||
| − | |5,000 |
||
| − | | |
||
| − | | |
||
| − | |} |
||
[[Category:Vehicles in Driver: San Francisco]] |
[[Category:Vehicles in Driver: San Francisco]] |
||
| − | [[Category: |
+ | [[Category:Police]] |
| + | [[Category:Police Departments]] |
||
| + | [[Category:Driver: San Francisco]] |
||
Revision as of 12:08, 9 July 2021
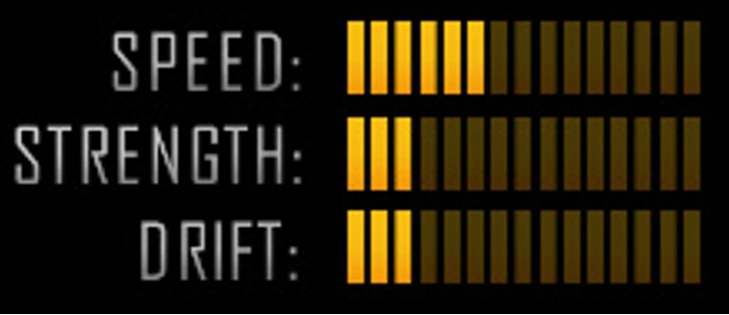
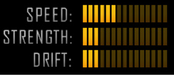
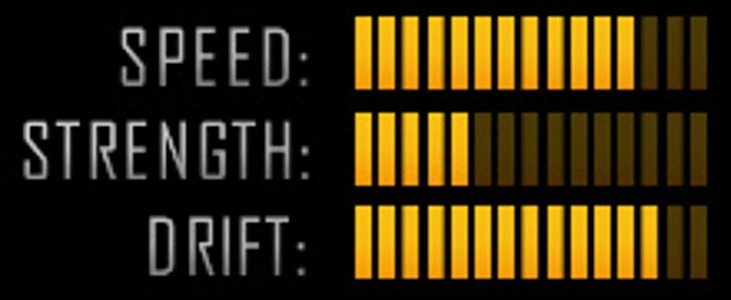
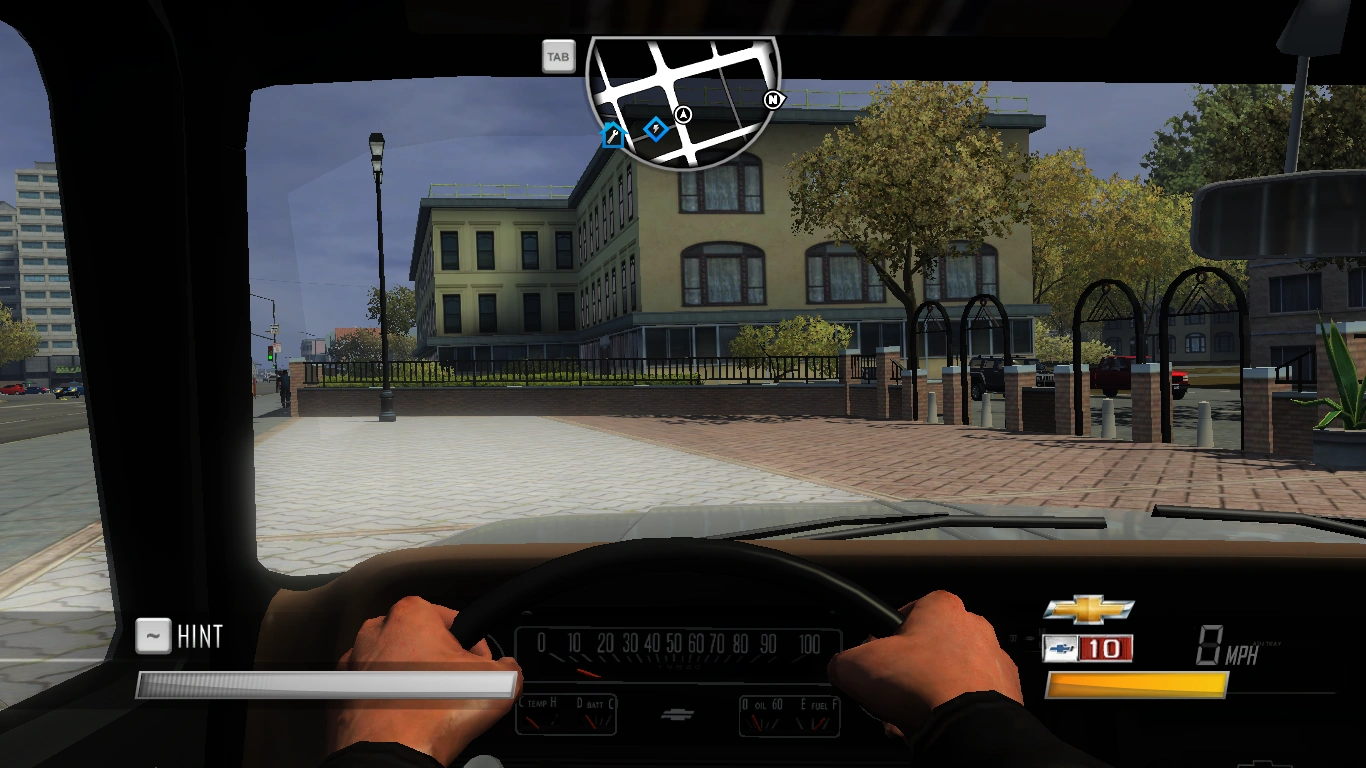
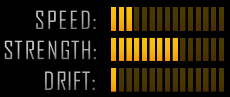
Driver: San Francisco is the only game in the series that features licensed cars. Other popular brands of cars are placed in garages. There are a total of 10 garages around the city. Each bought garage unlocks access to challenges and vehicles that you can buy with earned willpower. You can earn more Willpower by completing dares, activities, and missions to buy cars. Each car has stats (SPEED, STRENGTH AND DRIFT) that if it totally fits to the dares, or your everyday tours. Want more? Go and check 140 licensed cars in Driver: San Francisco!
(Note: The arrangement of the cars are based on the less-more willpower cost, not alphabetically.)
Abarth
| Picture | Name |
Willpower cost |
Cockpit
View |
Stats |
|---|---|---|---|---|
 |
Fiat 695 SS Assetto Corse | 5,000 | 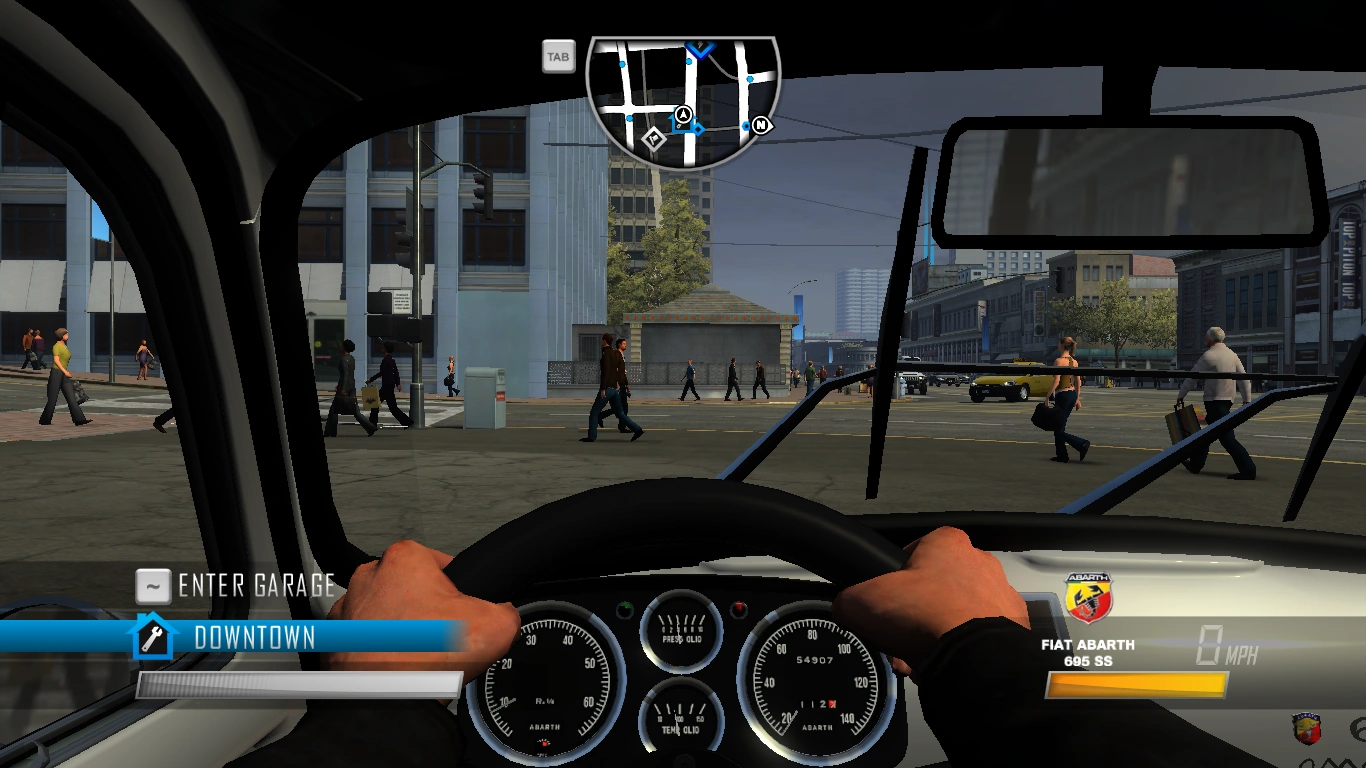 |
 |
  |
500 | 7,500 | 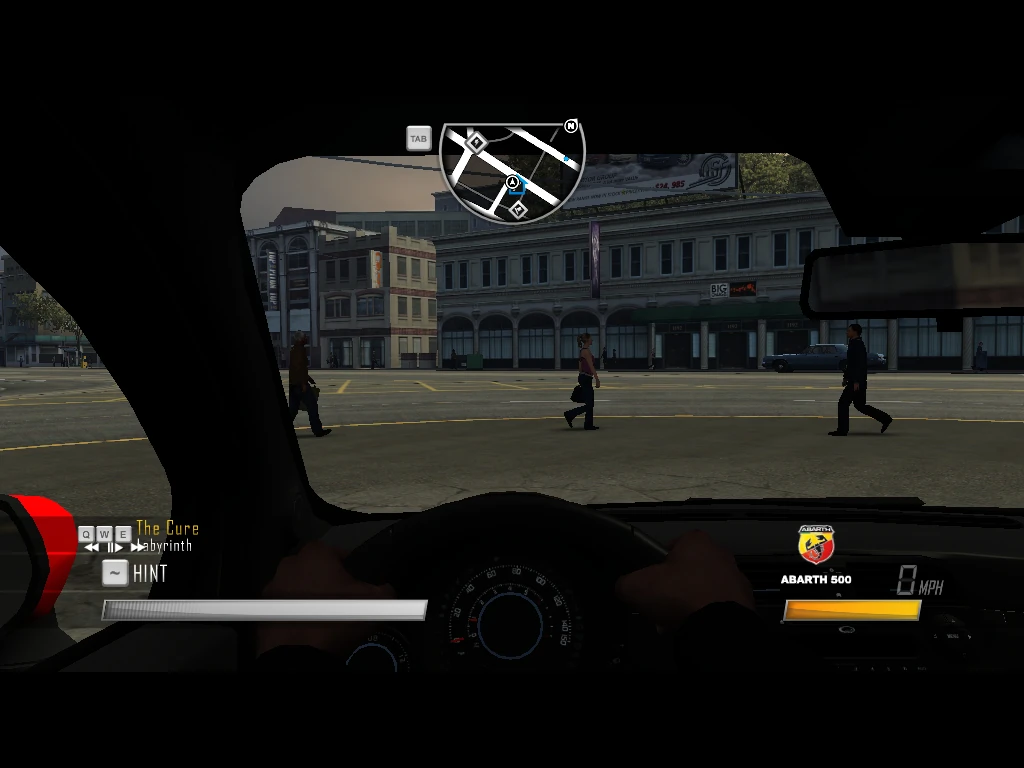  |
  |


Alfa Romeo
| Picture | Name | Willpower cost | Cockpit
View |
Stats | ||
|---|---|---|---|---|---|---|
  |
159 TI | 1,000 | 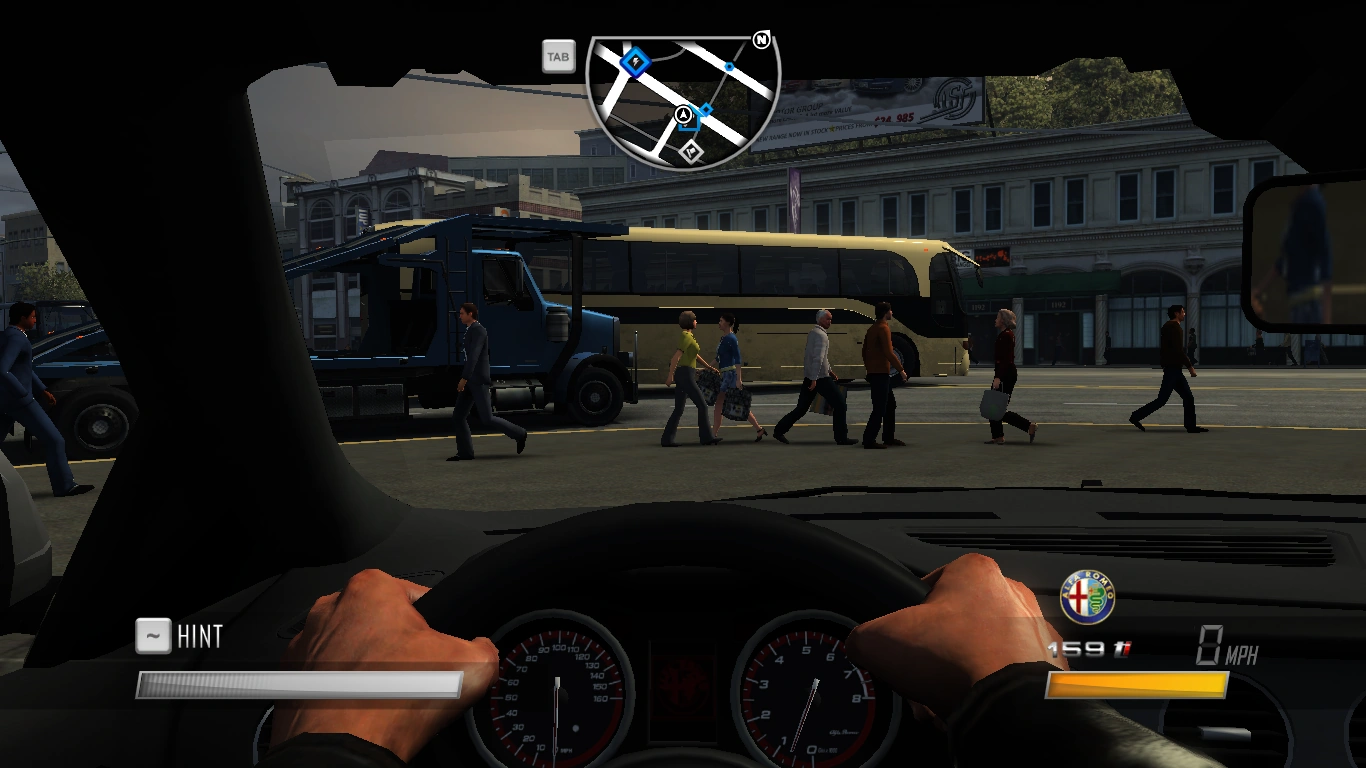  |
  |
||
  |
Mito | 2,500 | 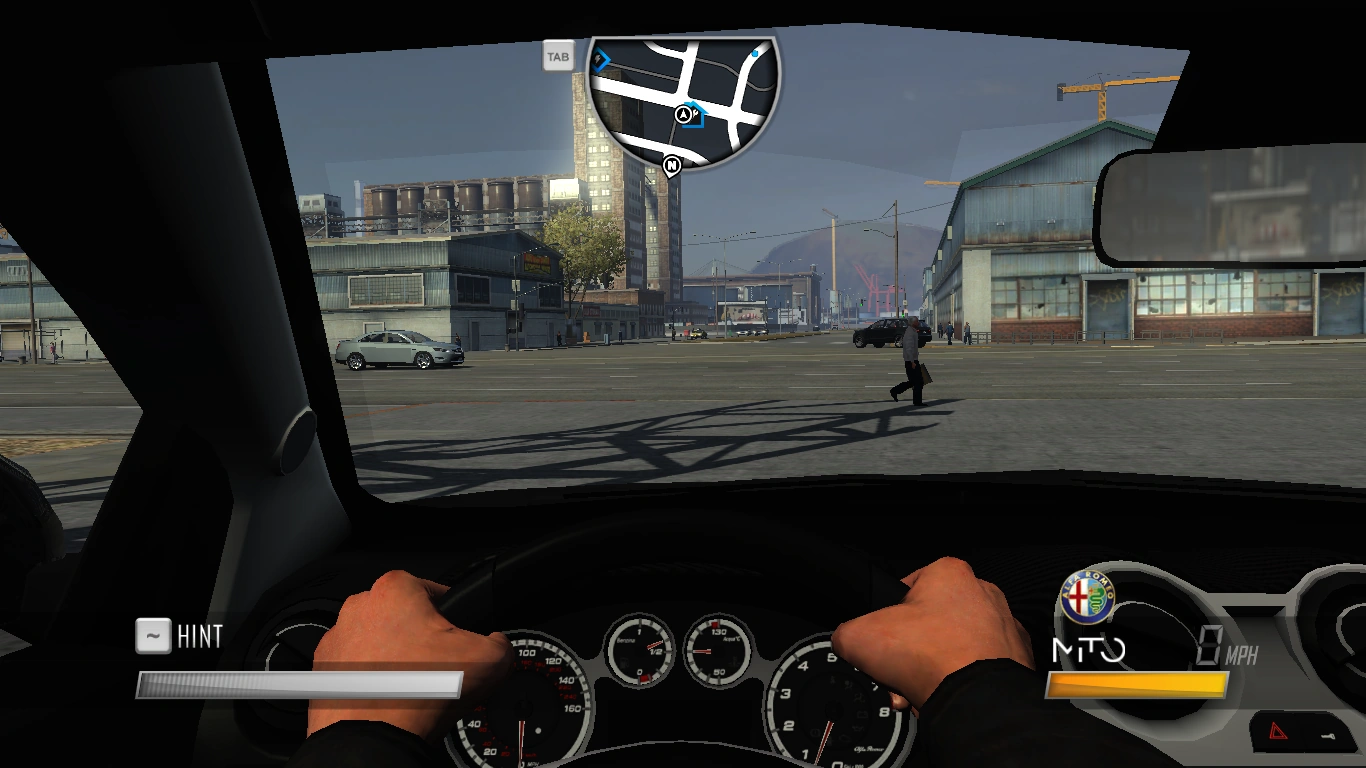  |
  |
||
  |
Giulietta | 3,000 | 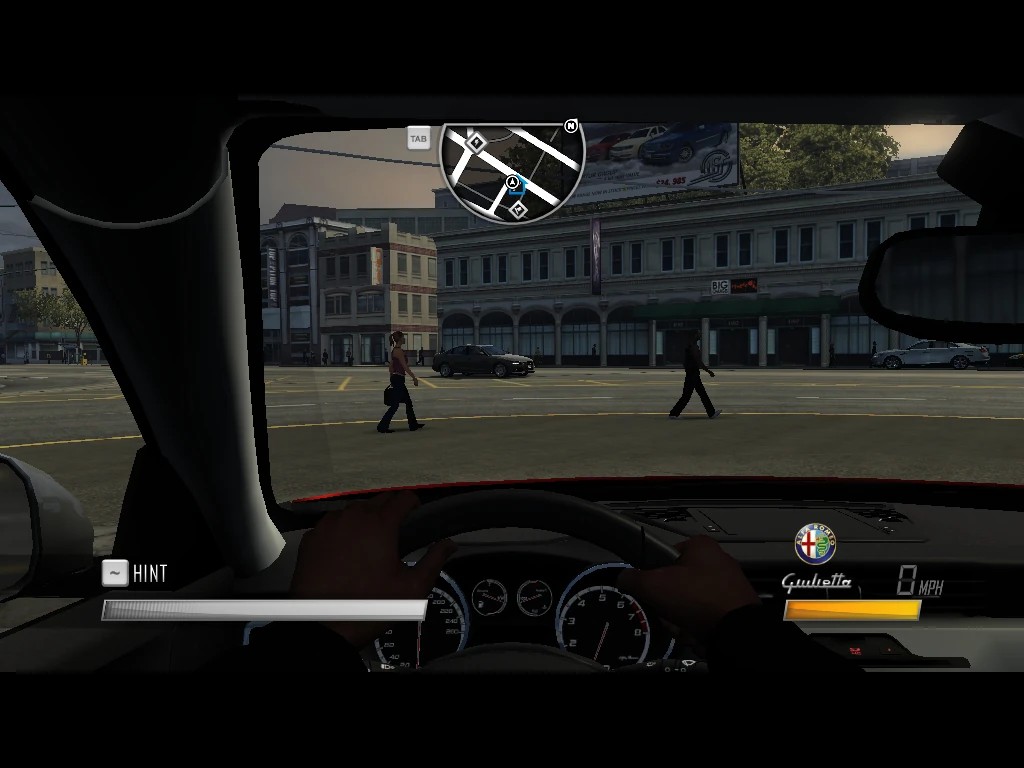  |
  |
||
  |
Spider
Duetto |
5,000 |   |
  |
||
  |
8C Competizione | 70,000 |   |
  |
||
  |
Giulia TZ2 | 80,000 | 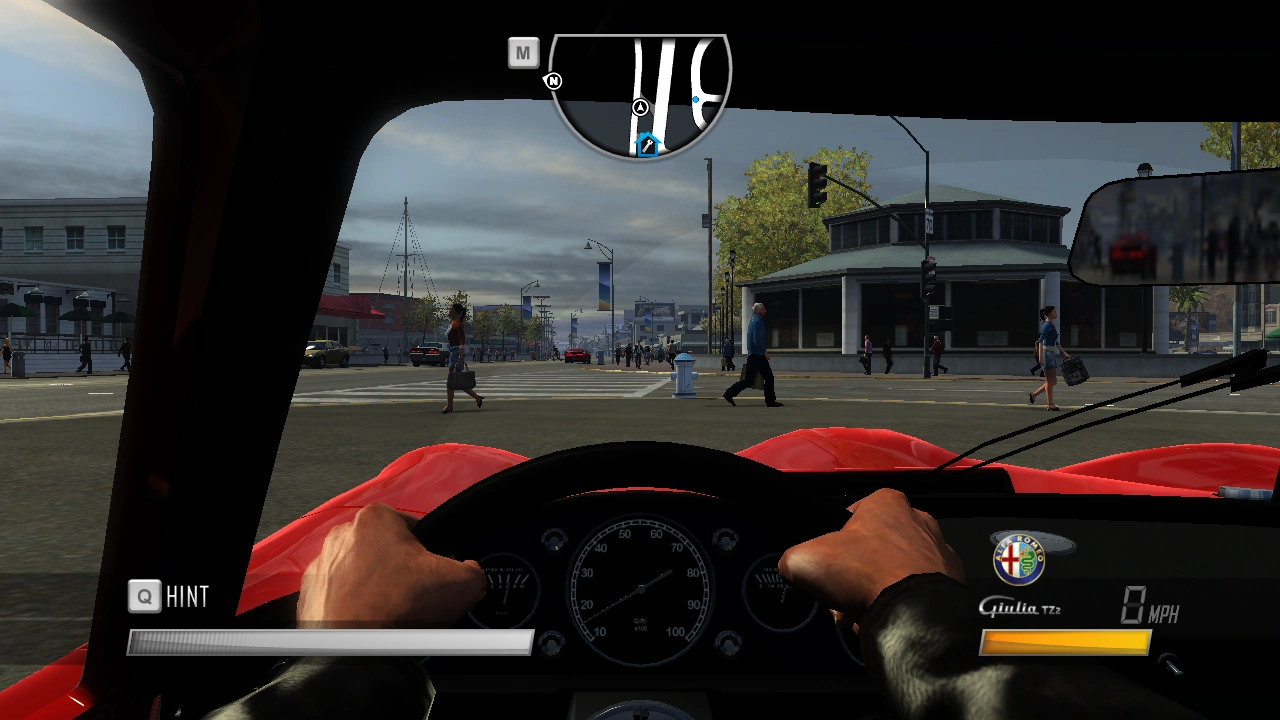  |
  |


American Motors Corporation (AMC)
| Picture | Name | Willpower cost | Cockpit
View |
Stats |
|---|---|---|---|---|
  |
Pacer | 1,000 |  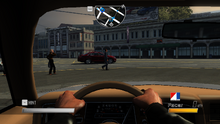 |
  |


Aston Martin
| Picture | Name | Willpower cost | Cockpit
View |
Stats |
|---|---|---|---|---|
  |
Cygnet | 15,000 | 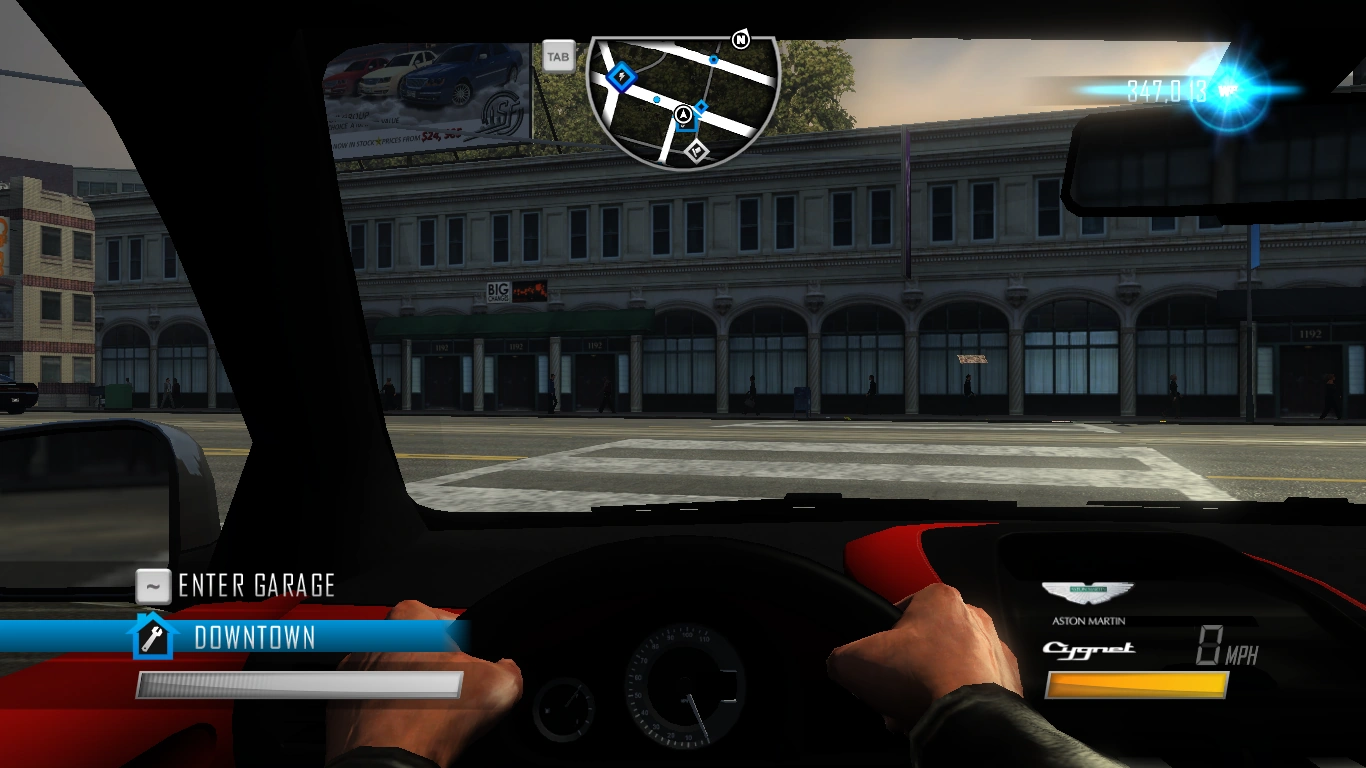  |
  |
  |
DB9 Volante | 50,000 |   |
  |
  |
Rapide | 75,000 | 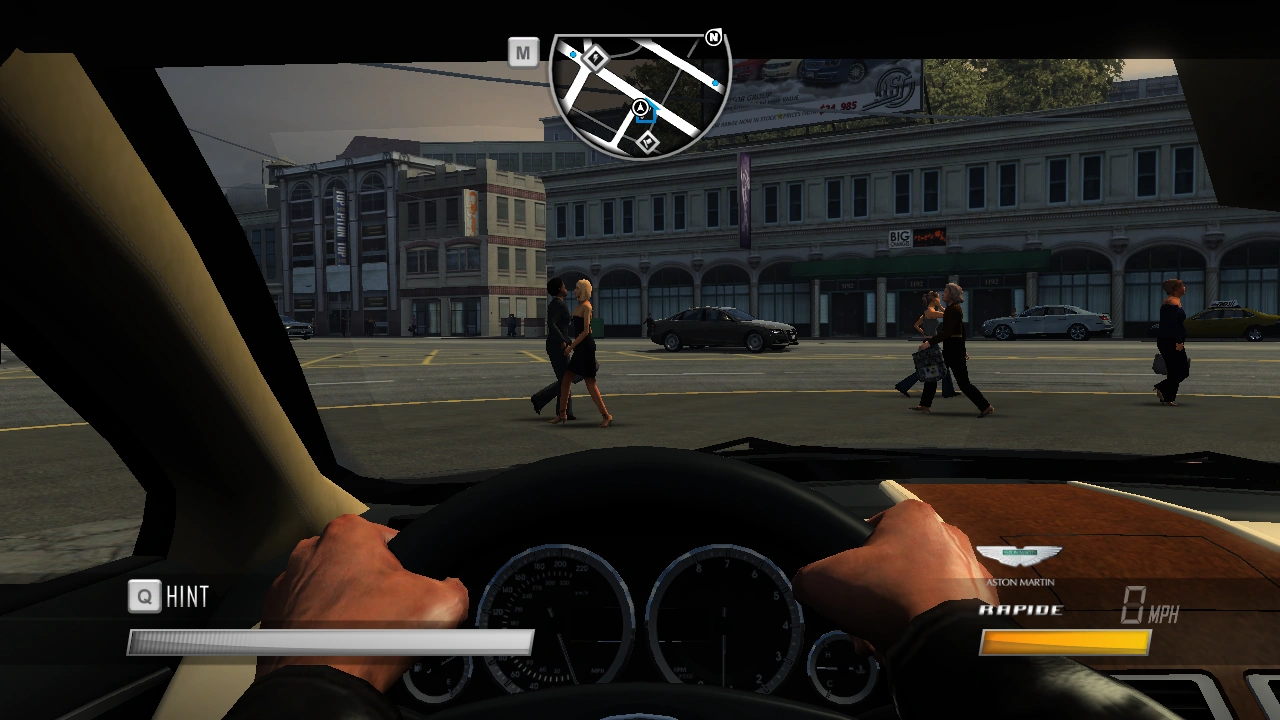  |
  |
  |
V12 Vantage | 90,000 | 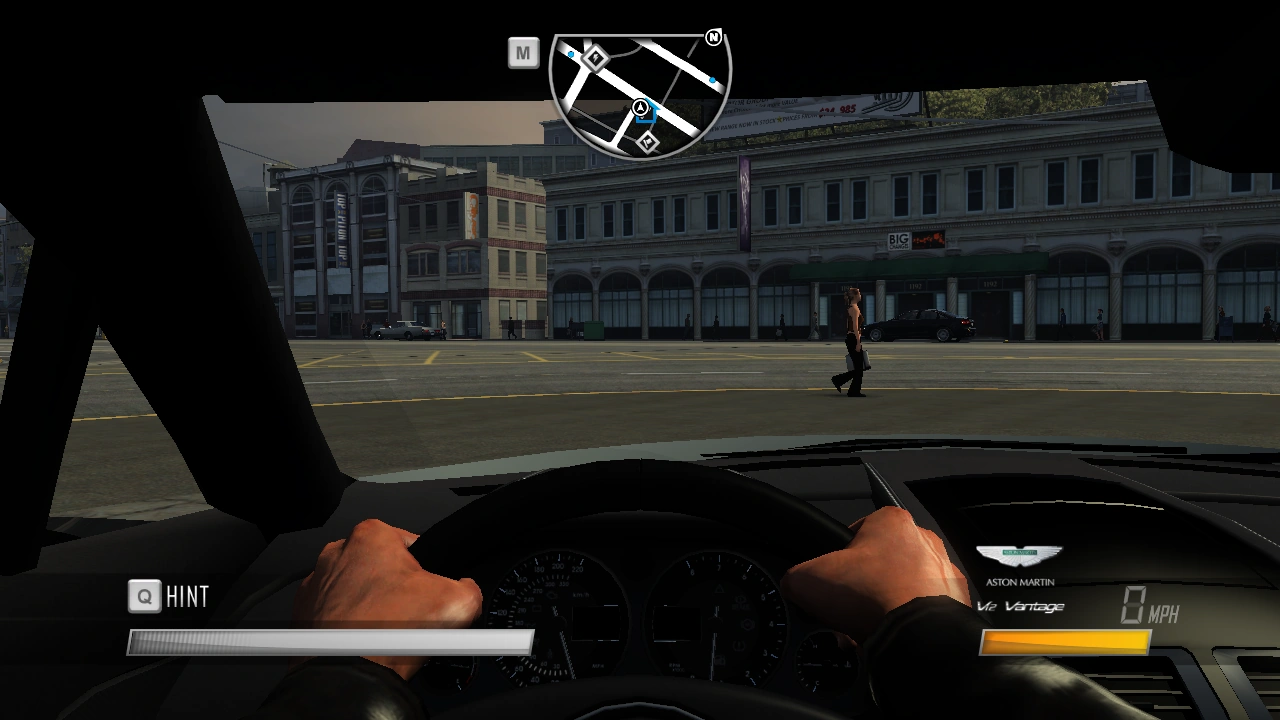  |
  |
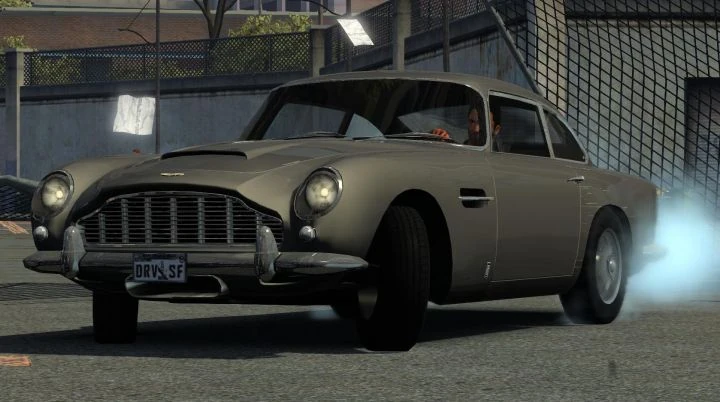  |
DB5 | 100,000 | 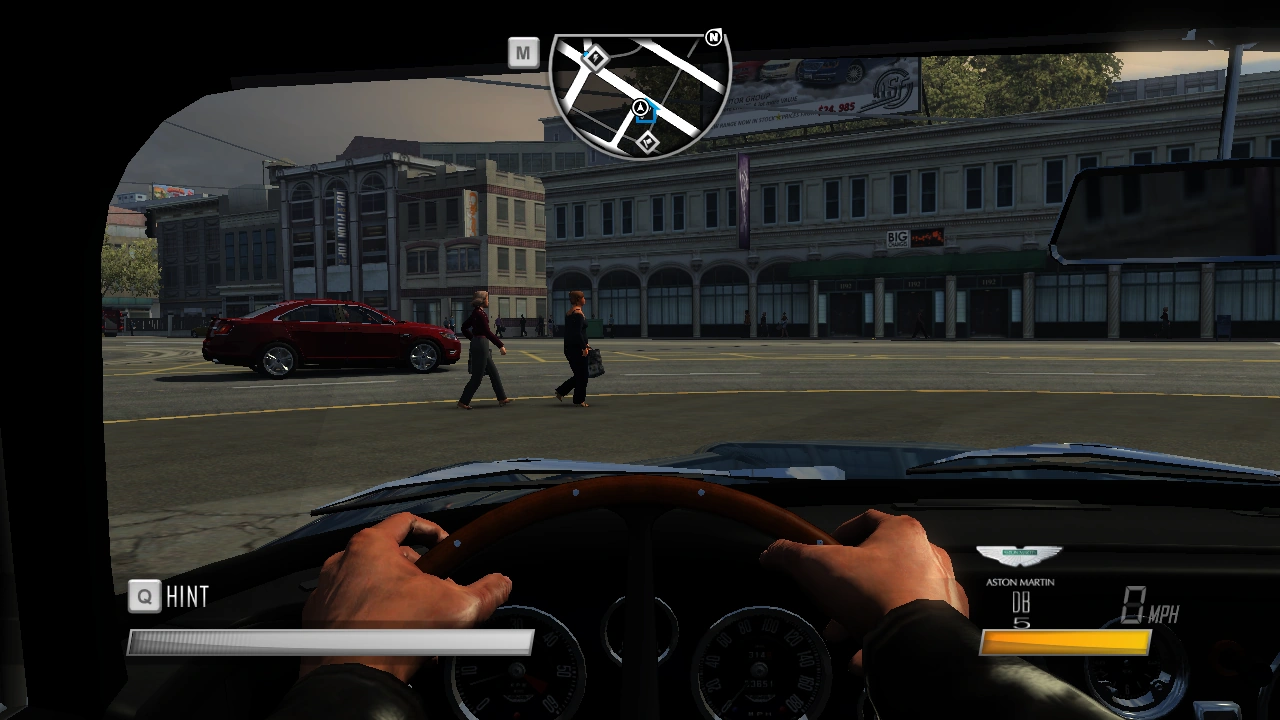  |


Audi
| Picture | Name | Willpower
cost |
Cockpit
View |
Stats |
|---|---|---|---|---|
  |
A4 2.0 TFSI | 8,000 | 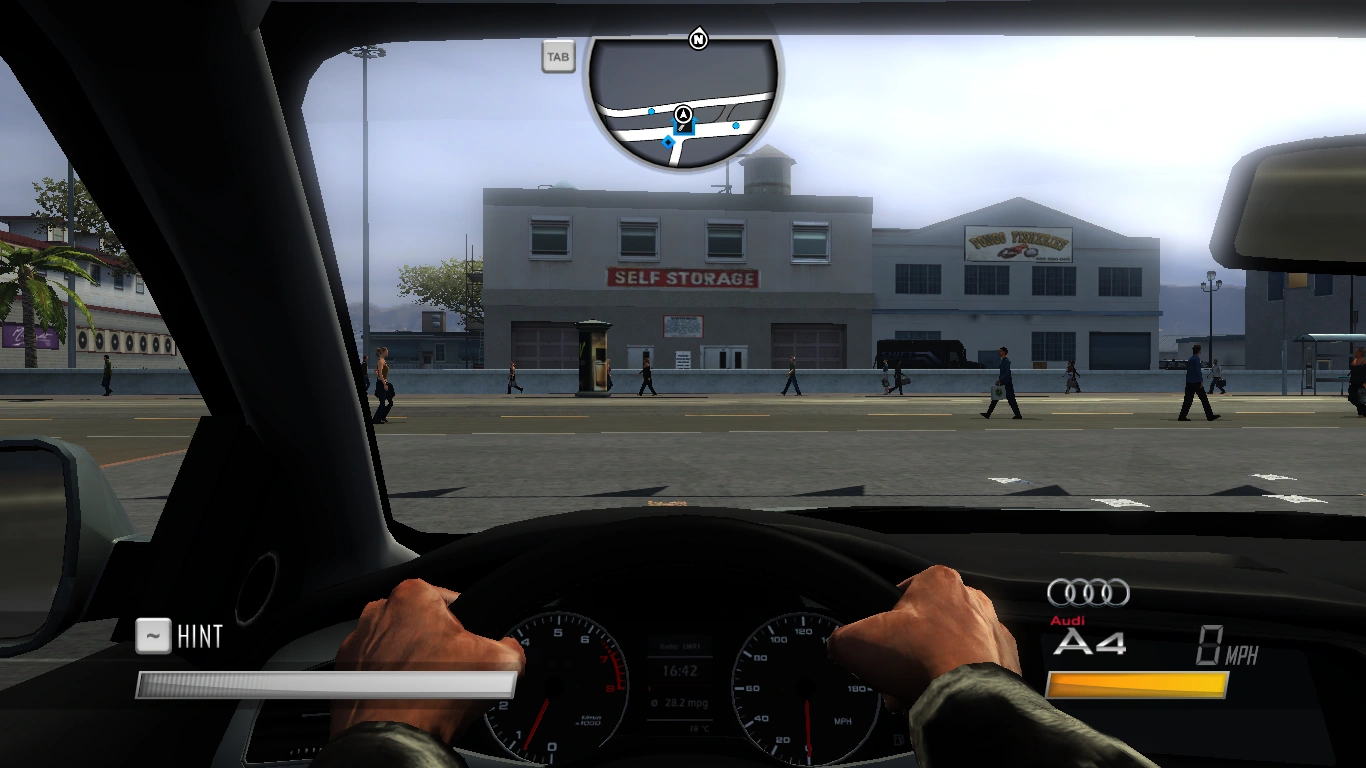  |
  |
  |
Q7 4.2 FSI Quattro | 10,000 | 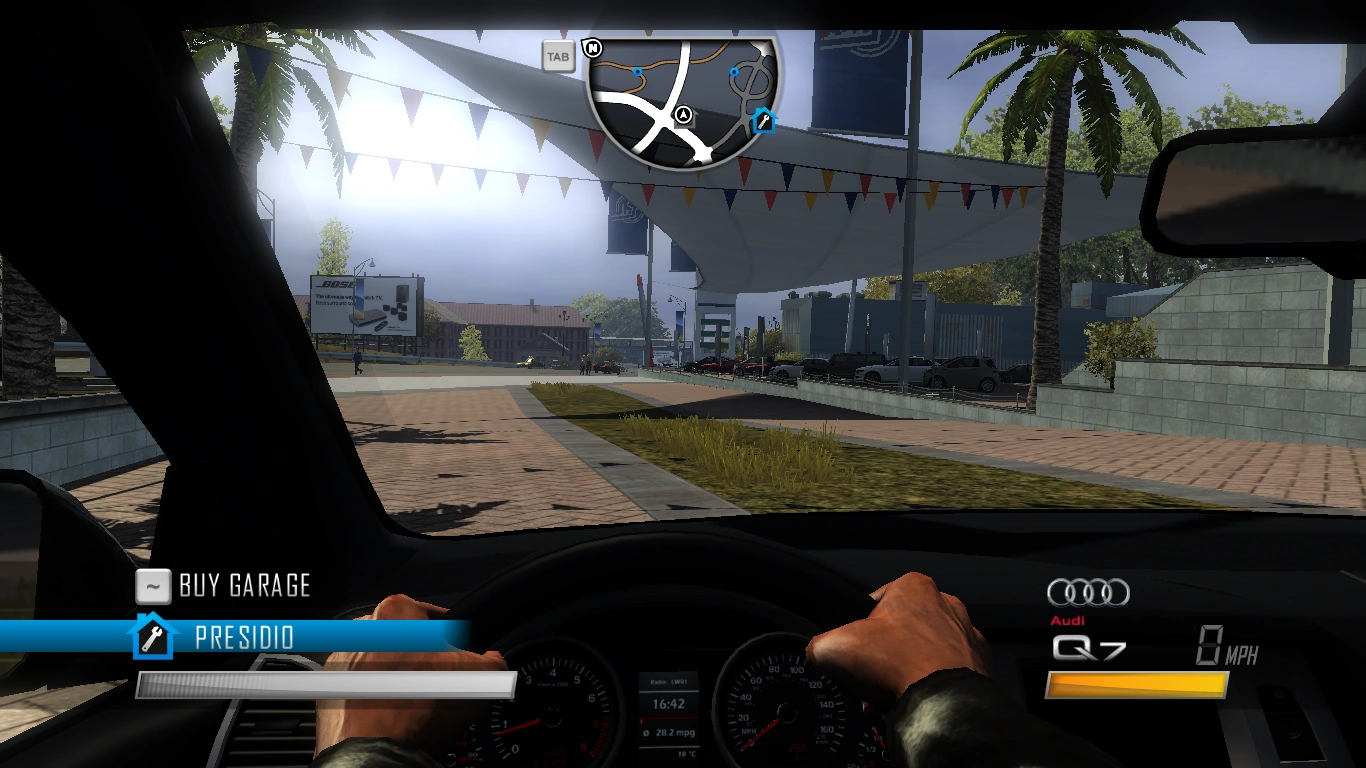  |
  |
  |
S5
Coupé |
15,000 | 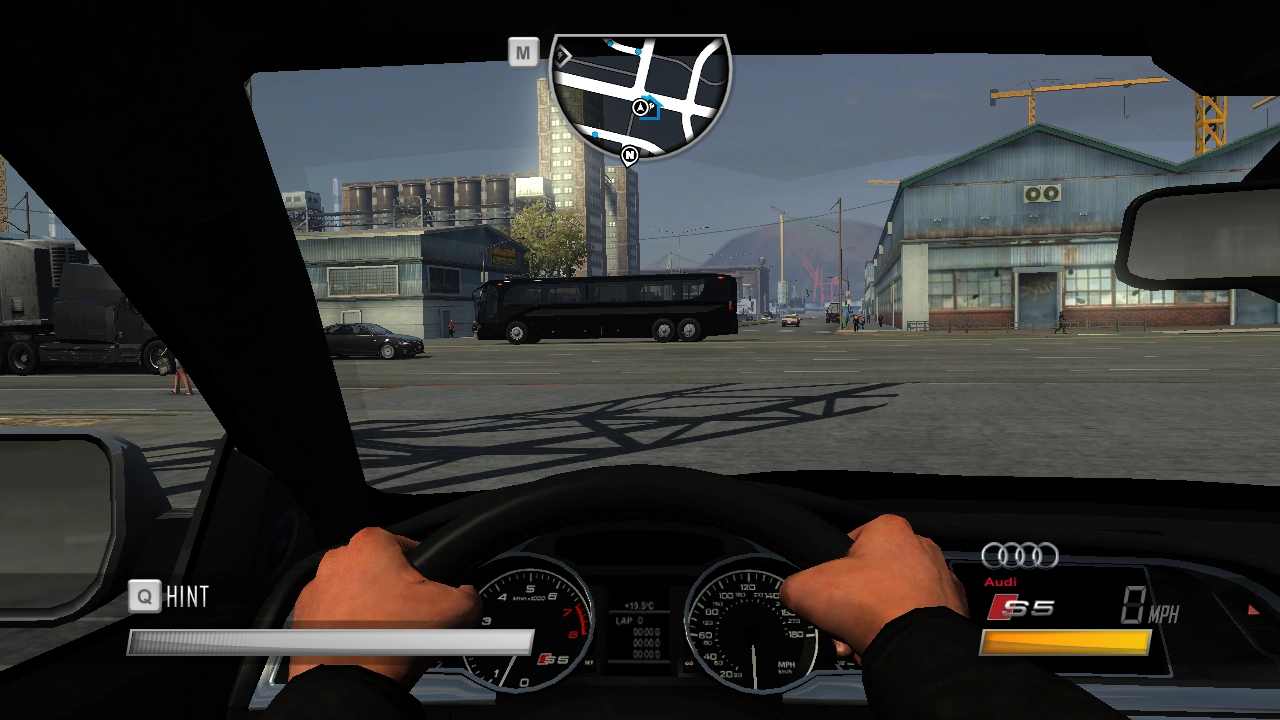  |
  |
  |
TT RS Coupé | 20,000 | 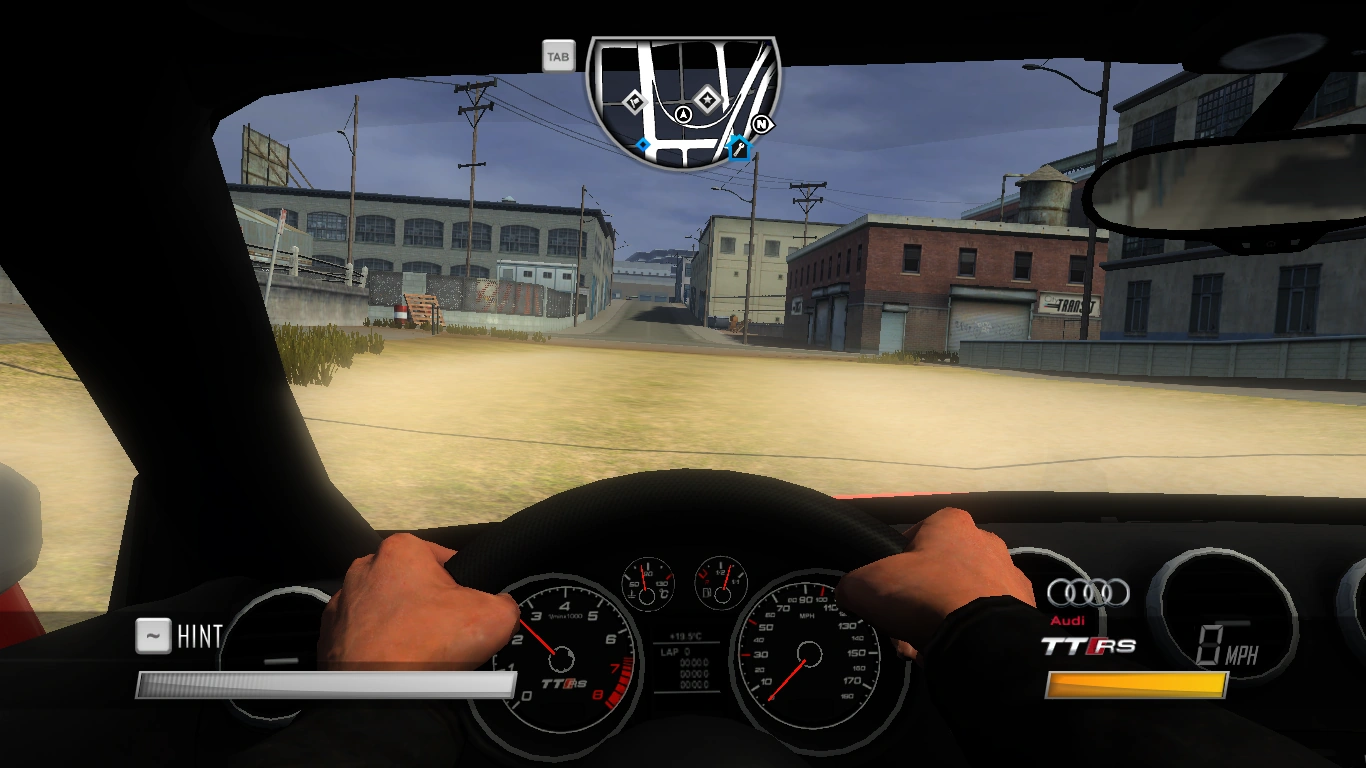  |
  |
  |
RS 6
Avant |
40,000 | 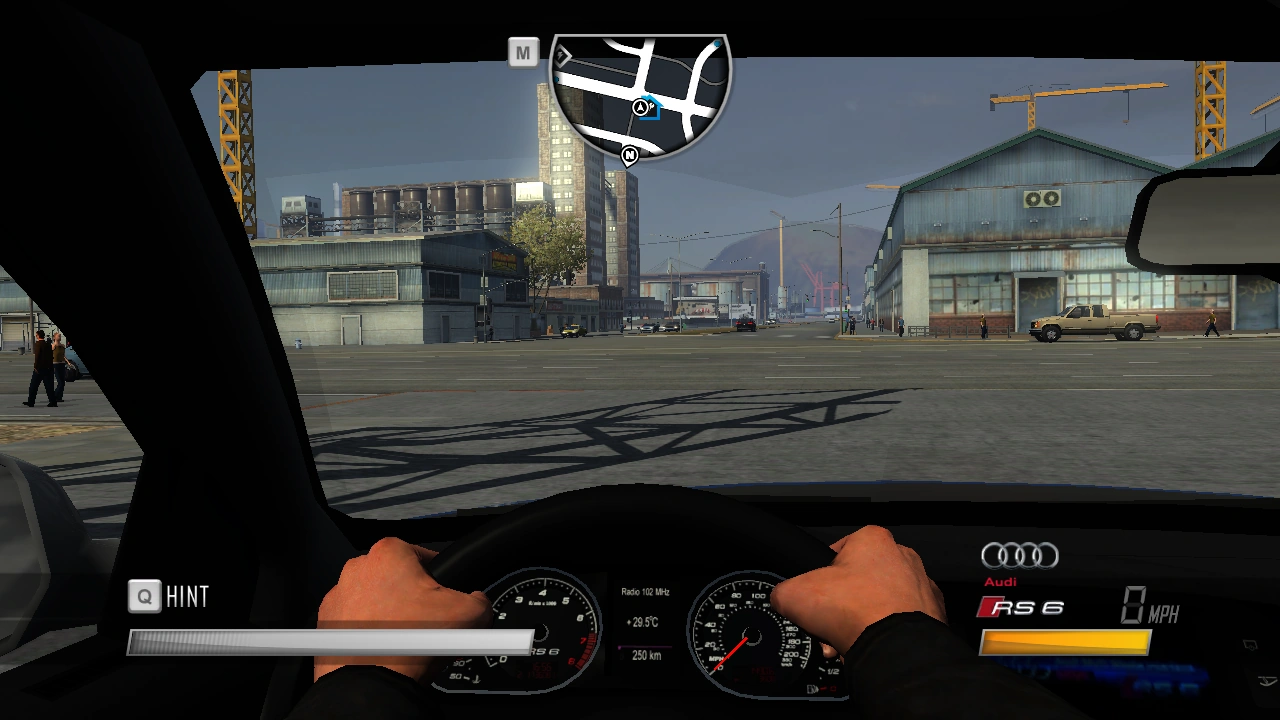  |
  |
  |
R8 5.2 FSI Quattro | 130,000 |   |
  |
  |
Sport Quattro S1 | 150,000 |   |
ASYM
| Picture | Name | Willpowercost | Cockpit view | Stats |
|---|---|---|---|---|
  |
Desanne
3.0T |
5,000 |   |
  |
  |
Desanne
X/T Pursuit |
5,000 |   |
|
  |
Desanne
LX |
5,000 |   |
|


Bentley
| Picture | Name | Willpower cost | Cockpit
View |
Stats |
|---|---|---|---|---|
  |
Arnage T | 150,000 |   |
  |
  |
Continental Supersports | 200,000 | 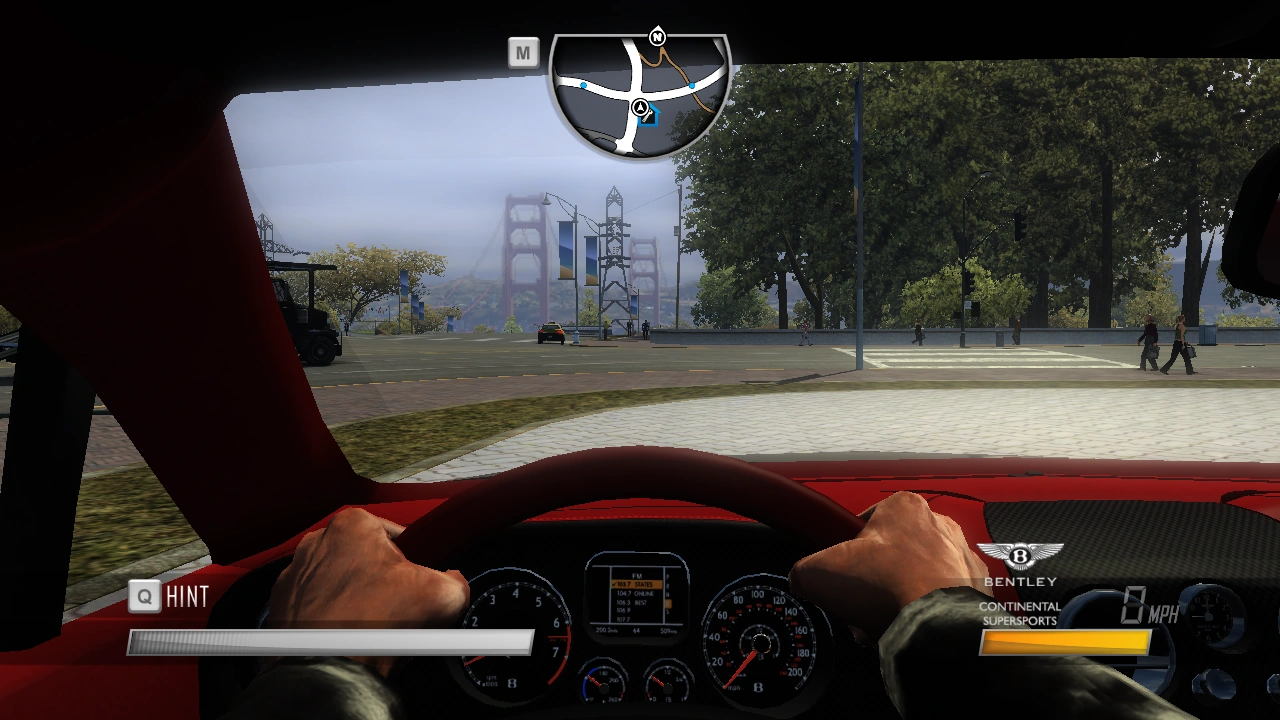  |
  |


Cadillac
| Picture | Name | Willpower
cost |
Cockpit
View |
Stats |
|---|---|---|---|---|
  |
DTS | 1,000 |   |
  |
  |
Escalade (Civilian) | 1,000 |   |
  |
  |
CTS-V | 5,000 | 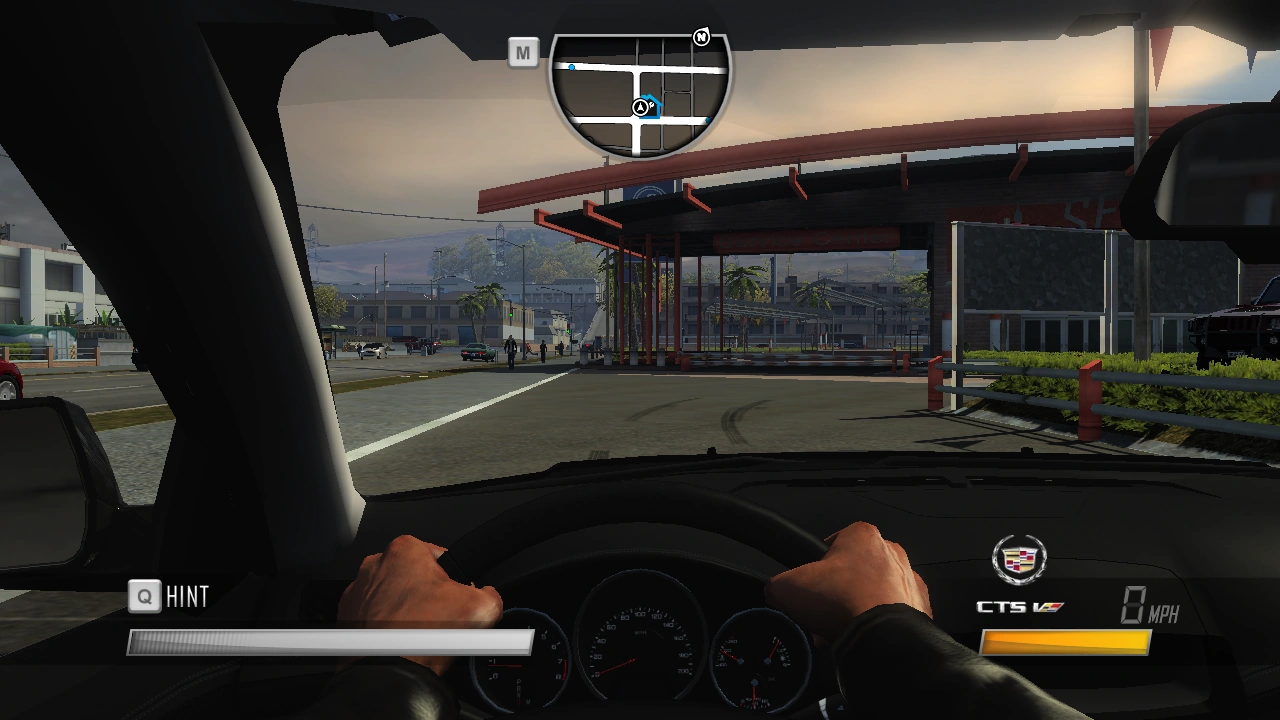  |
  |
  |
XLR-V | 5,000 | 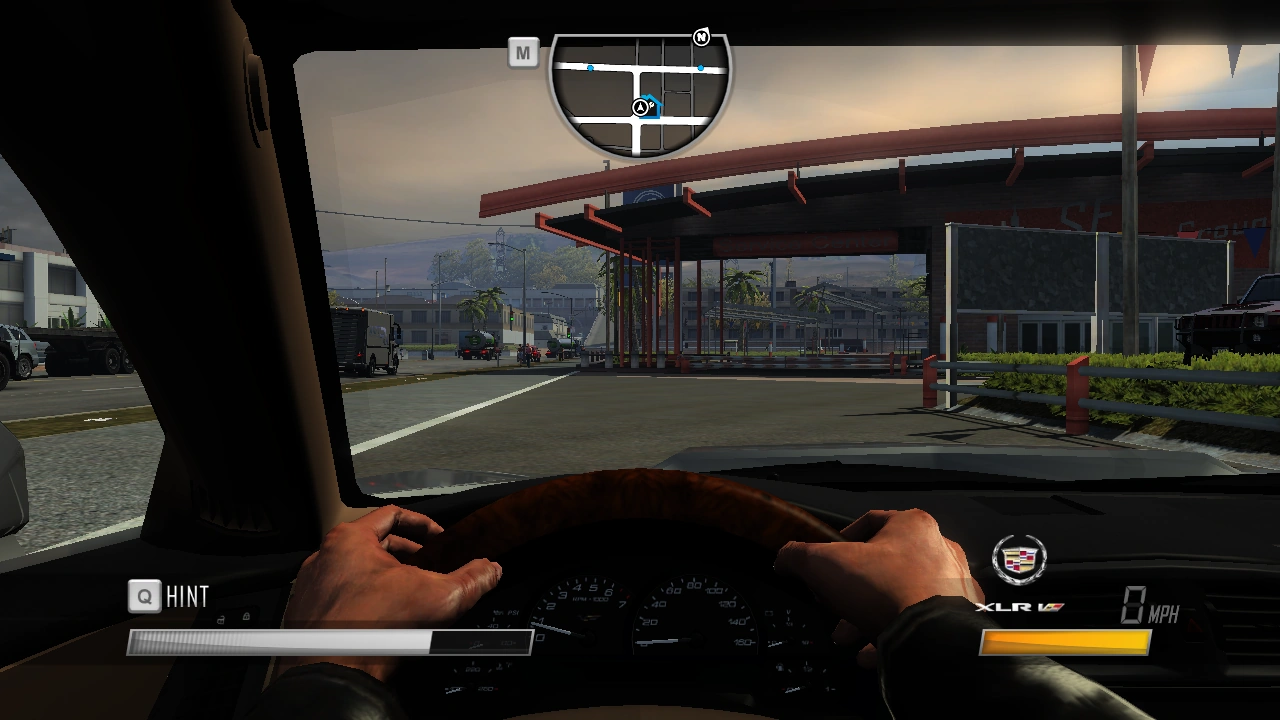  |
  |
  |
Eldorado | 10,000 | 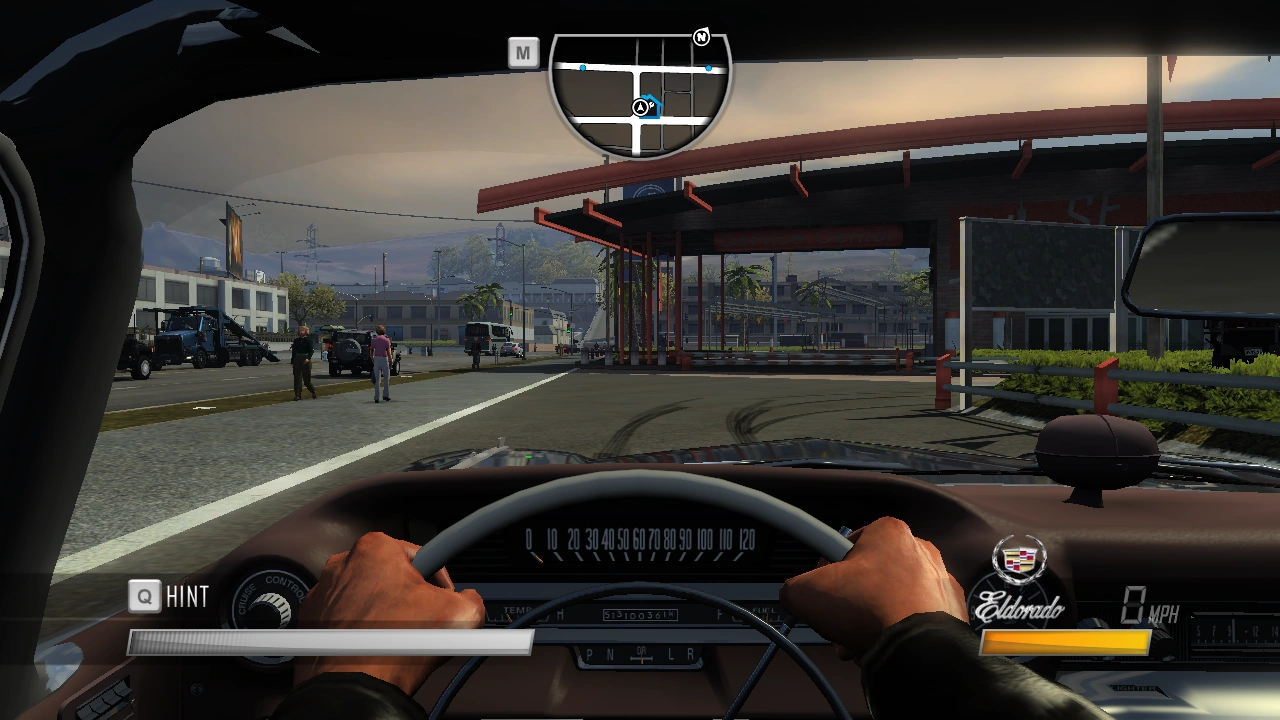  |
  |
  |
Escalade (Cop) | 15,000 | 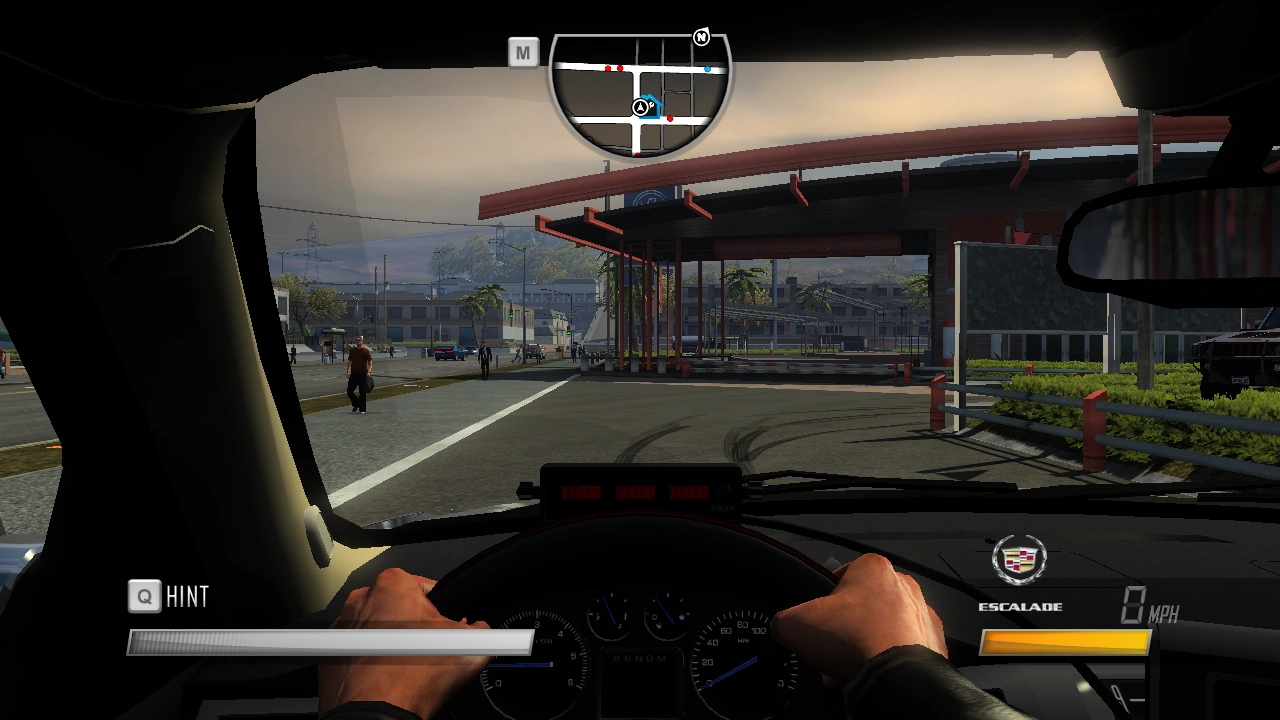  |
  |
Caisson
| Picture | Name | Willpower cost | Cockpit
View |
Stats |
|---|---|---|---|---|
  |
Fairview | 1,000 |   |
  |
  |
Whippet | 3,000 | 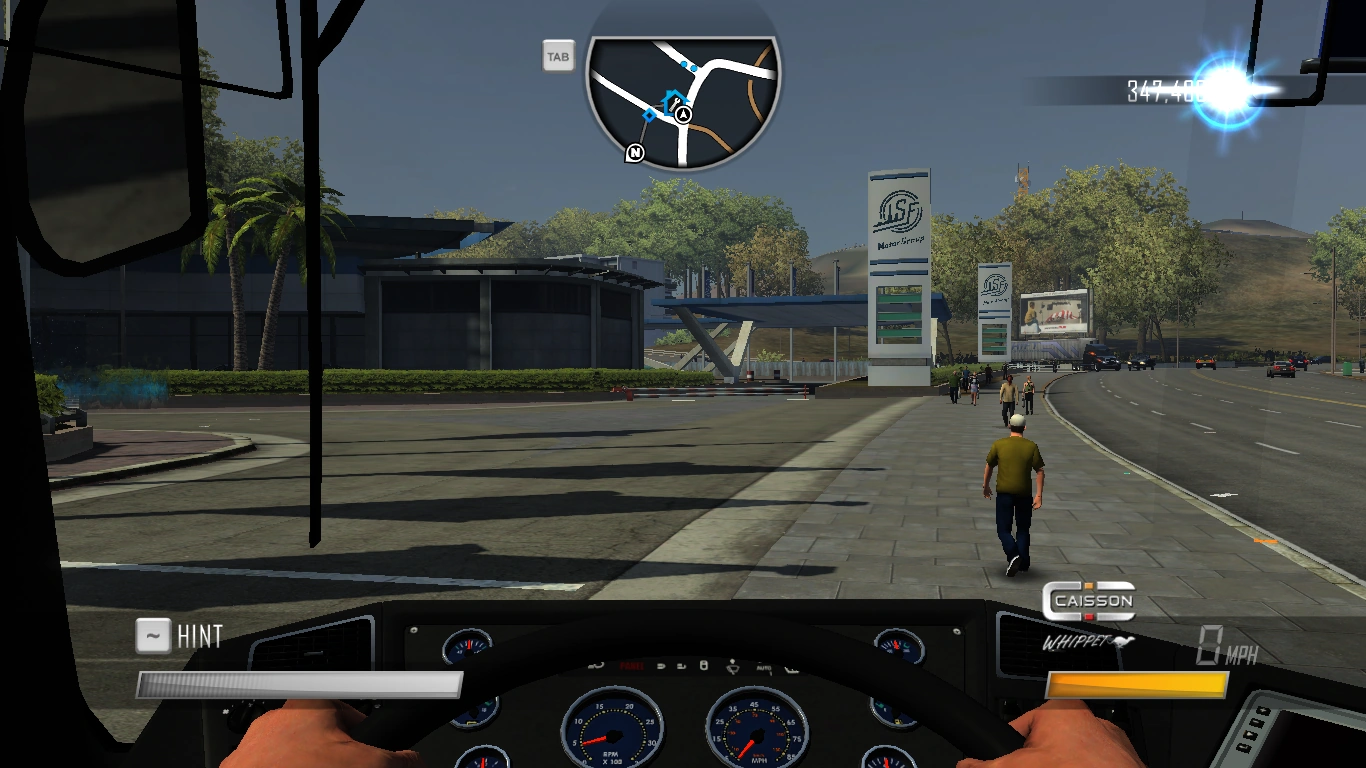  |
  |
  |
Elementary C | 5,000 | 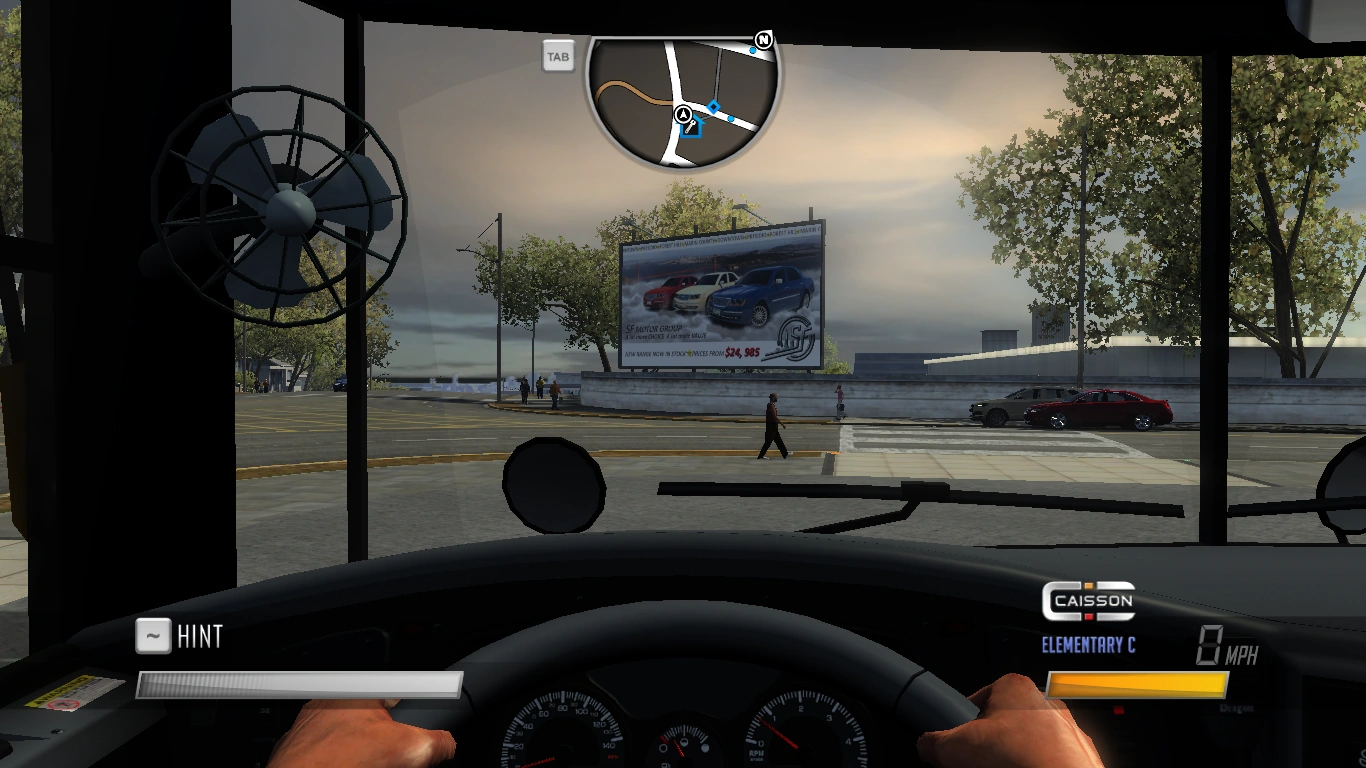  |
  |


Camion
| Picture | Name | Willpower
cost |
Cockpit
View |
Stats |
|---|---|---|---|---|
  |
Hydramax 505 | 5,000 |   |
  |
  |
Hydramax AERV | 10,000 |   |
  |
Chevrolet


Delorean
| Picture | Name | Willpower
Cost |
'Cockpit'View | Stats |
  |
DMC-12 | 10,000 | 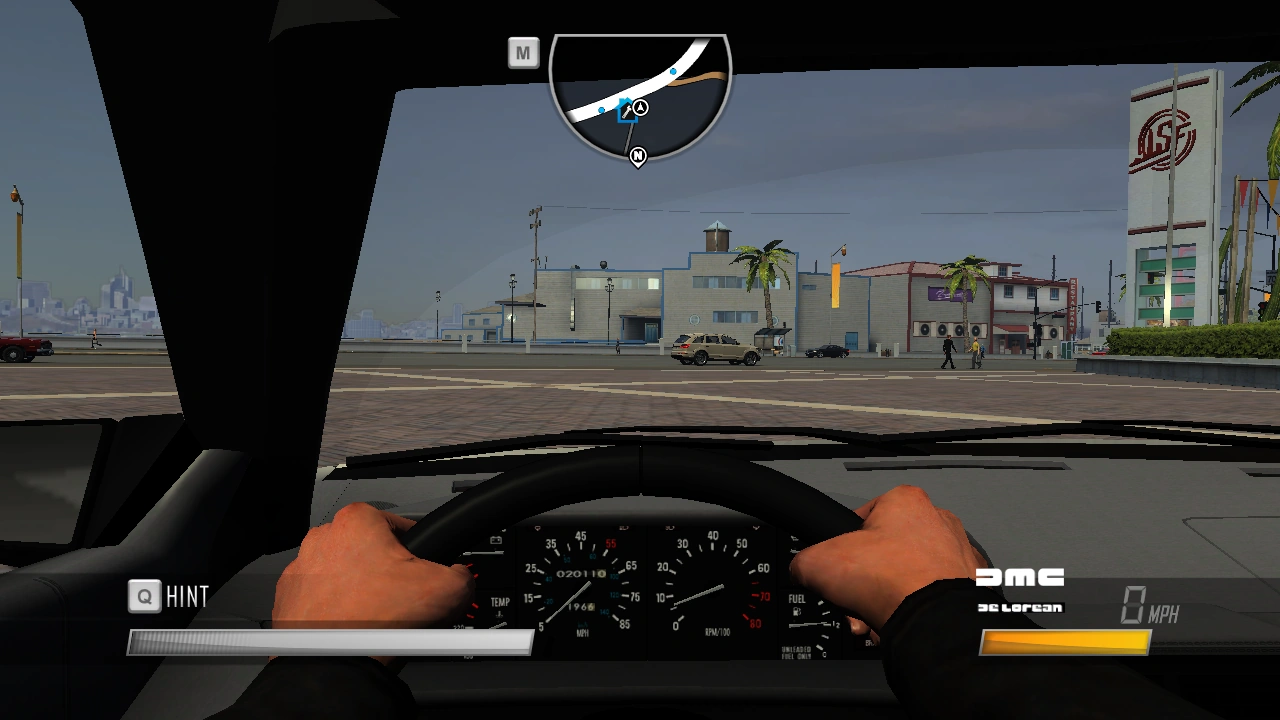  |
  |


.png)
.png)
.png)
.png)